

They say April showers brings May flowers and after every storm is a rainbow. So you know I had to combine both of those ideas for this DIY! And I mean, what a perfect gift for mom this Mother’s Day!! Ugh, I just love it so much!! Check out how to make your very own!


Rainbow Planter
Supplies:
– Air Dry Clay
– Clay Cutting/Sculpting Tool
– Piece of Paper
– Scissors
– Primer paint
– Acrylic Paint (Red/Pink, Orange, Yellow, Green, Blue and Purple)
– Saran/Cling Wrap
– Rolling Pin
– Paint Brush
– Acrylic Sealer
How To:
PHASE 1 – Preparation
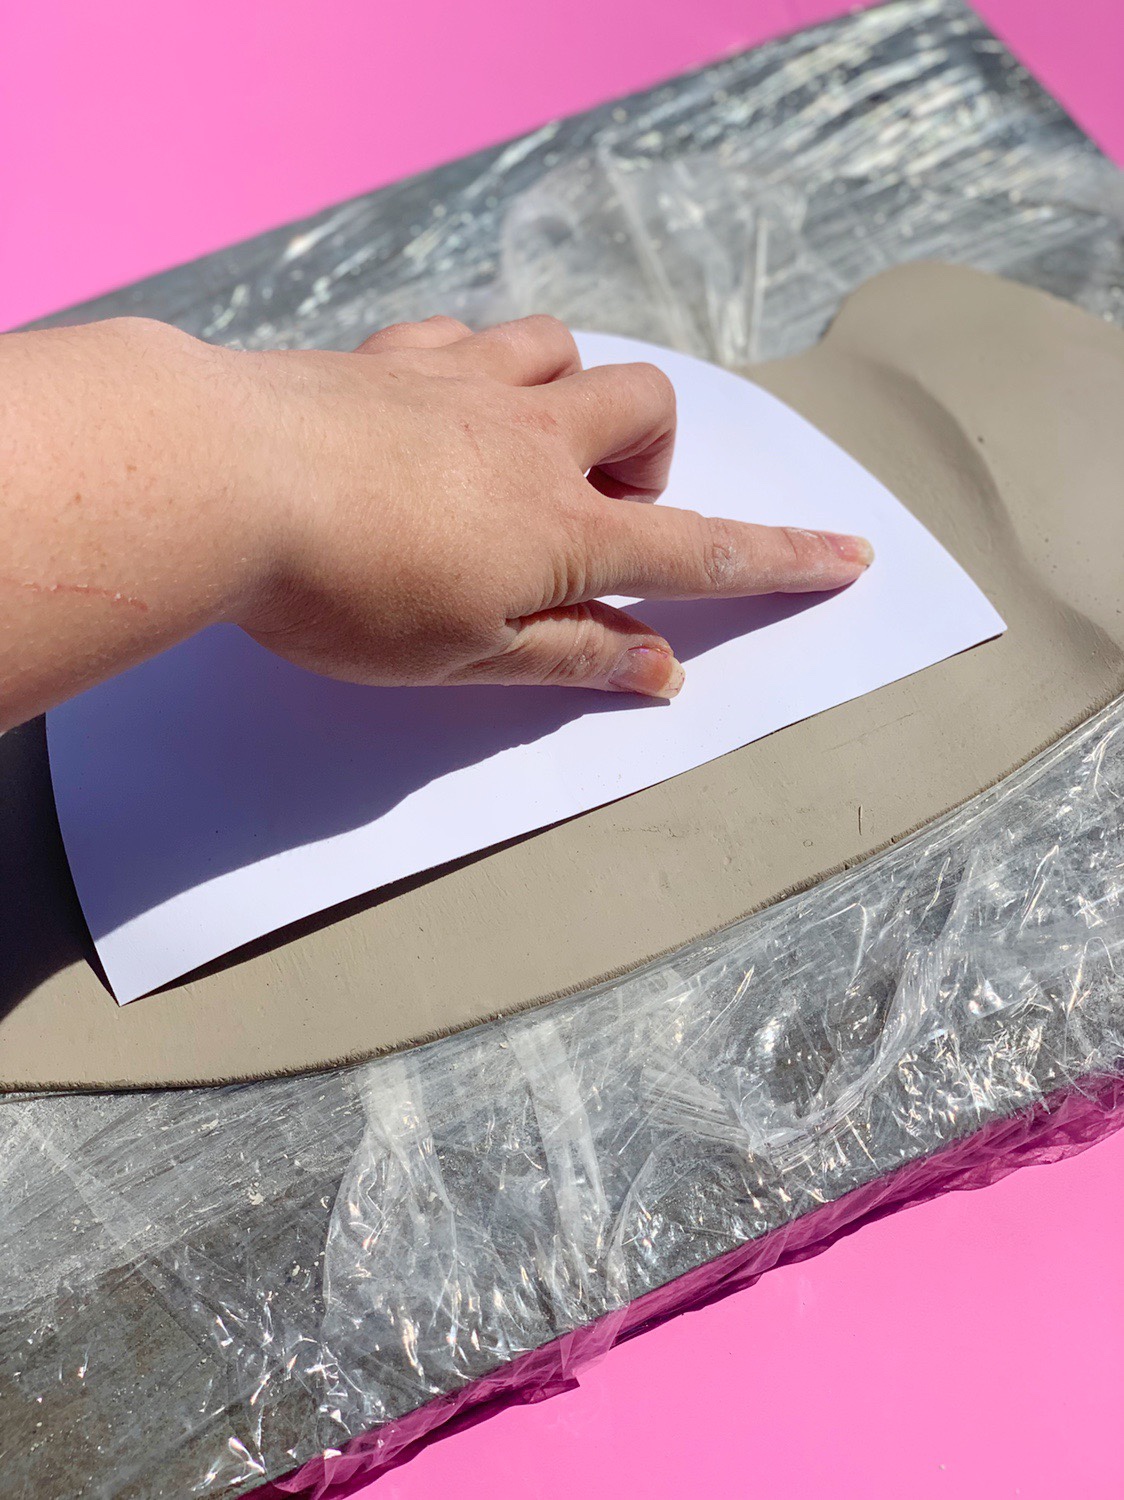
1.) Cut out an arch shape from your piece of paper. This will create a stencil for you to use. You can make your arch as little or as large as you like. The smaller the size, the smaller the planter will be and vice versa. Cutting out this stencil will help ensure both sides are the exact same size when you build the planter.
2.) Take a handful of clay, lay down saran (cling) wrap or newspaper on a flat surface and roll out your clay. Be sure to pick up and flip your clay periodically when rolling to ensure that the clay does not stick to the surface. This flat rolled out clay is referred to as a slab.
3.) Once you have your clay slab rolled out, take your stencil and lay it over the clay. Trace around the stencil with your knife tool and cut out the shape.
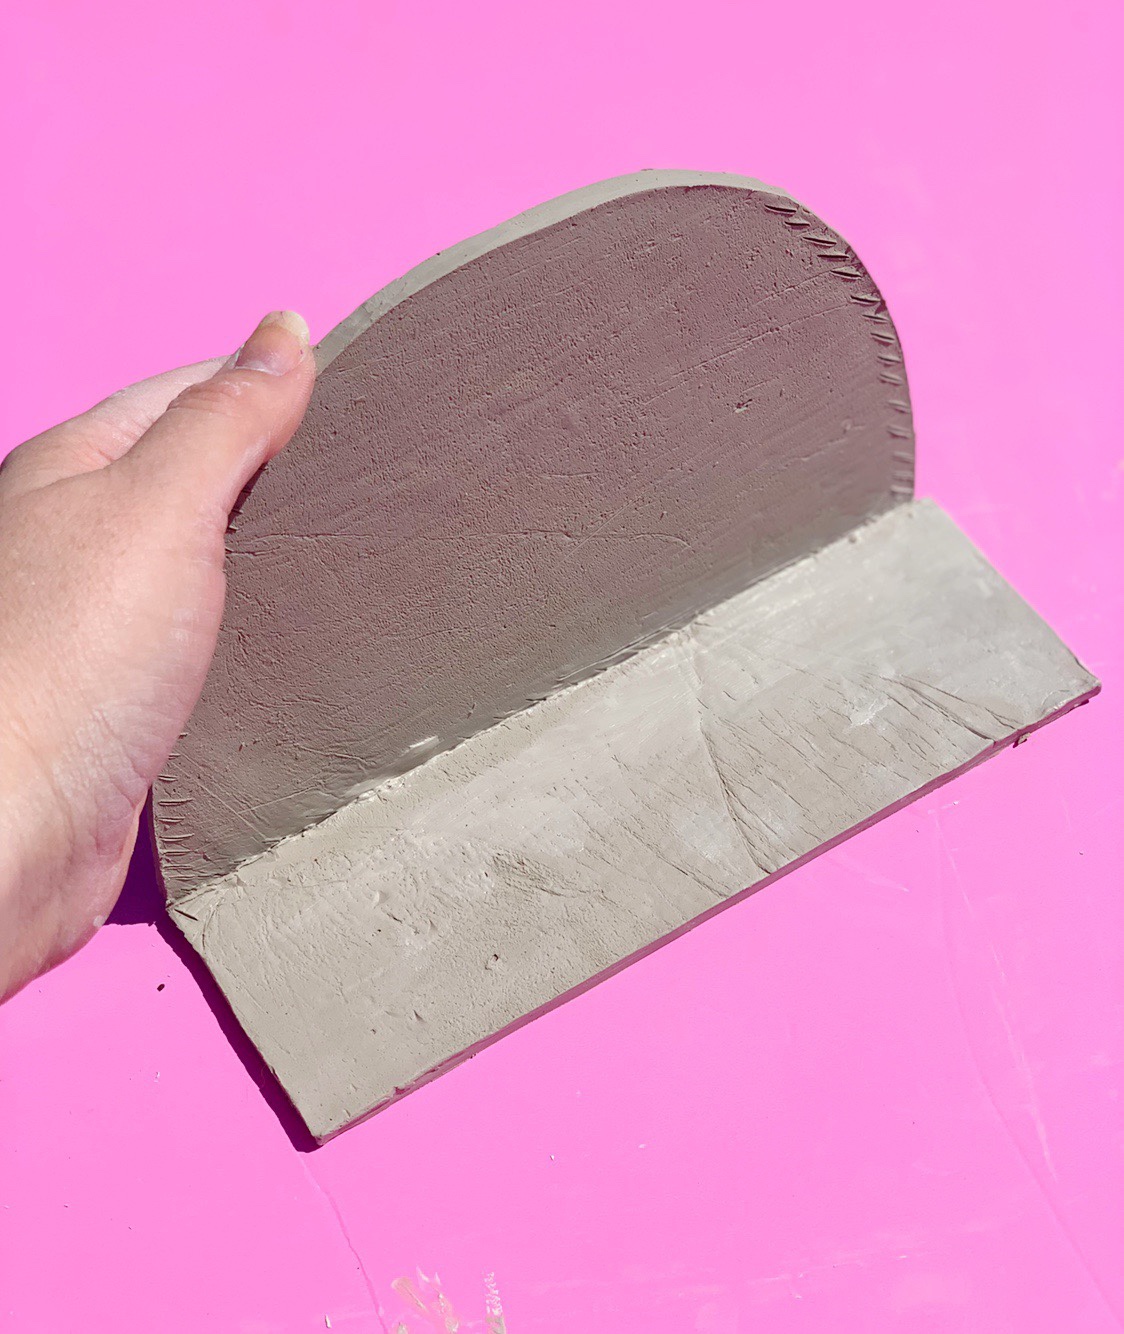
4.) Repeat steps 2 and 3 for a second time to create a duplicate arch-shaped slab.
5.) Now that you have the front and back of the planter, you will need to make slabs for the sides and bottom of the planter. Roll out another large slab of clay and place your stencil on top of it again. Rather than tracing around the entire shape like you just did, for the bottom we are purely concerned with the flat side of the arch. Cut along this line. This will tell you the exact length you need for the bottom slab. Now, you will determine the width of the bottom slab. This is entirely up to you! The wider the cut, the wider the planter will be. (I made my planter 2” wide.) Once you have determined the width you would like, measure it from the length that you just cut, and make coordinating cuts. This bottom slab will be a rectangle, so make sure the length and width are the same size on each corresponding side. Repeat this step 2 more times to create 3 identical rectangle slab shapes.
6.) *OPTIONAL STEP* If you are wanting your planter to home an actual live plant with soil, made a small little hole in the middle of your bottom slab to allow drainage to prevent root-rot.
7.) Allow all clay cuts to dry until stiff, but not too dry. The clay will still be more of a gray color than white, and you will be able to hold the slab up without it bowing or bending. Clay shrinks as it dries, so make sure all cuts are made at the same time and allowed to dry at the same time. Otherwise, once the slabs dry they may not fit together properly and could cause cracking when assembling.
PHASE 2 – Assembly
8.) Now that your slabs are firm, it’s time to assemble the planter. The first step to do this would be to make your slip. “Slip” is a mixture of clay and water which acts as a glue to join your pieces together. To make slip, simply pull small pieces of clay and add them to a bowl with water. Mix the clay and water together until there is a firm paste-like texture. Set aside for now.
9.) Next you will score your slabs. To score your piece of clay means to scratch hatch marks (or lines) on it as part of joining clay pieces together. This gives the slip something to grip onto to hold the slabs together. For your planter, you will only need to score the areas in which your slabs will be joined together. This would be the bottom of the back of each arch slab and the sides of each rectangle slab.
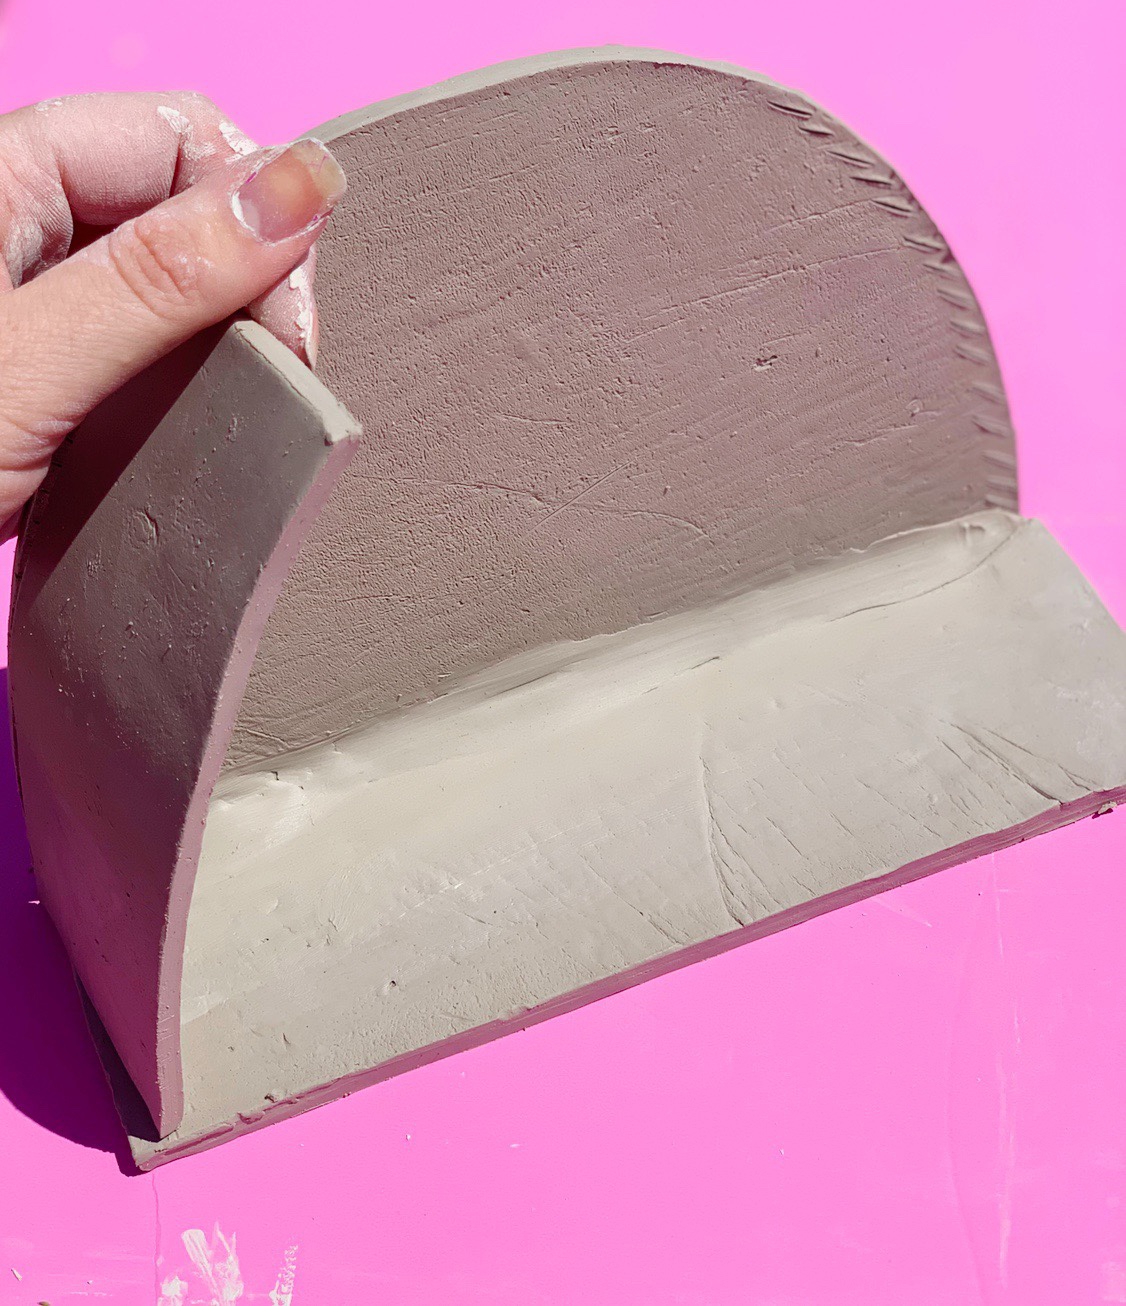
10.) Now that your slabs are properly scored, take the bottom slab piece and one of the arch side pieces and join together. Take your slip and spread it over the hatch marks you just created. Take both slabs and (delicately) smash the slipped sides together at a right angle. Using your sculpting tools (or your fingers) spread the access slip between the two slabs. For extra support to hold up the arch slab wall, you can take a small coil (or rope) of clay and place it along the intersecting corner where the slabs meet. Spread this coil of clay out along the sides. If you waited for your clay to properly firm, your structure should be able to stand on its own once combined.
11.) You will be doing this same assembly step for each side until the planter is fully formed. I chose to add the rectangle sides to the existing structure before adding the other arch slab to give it a little extra support, but you can totally do both arch slabs before the sides if you want!
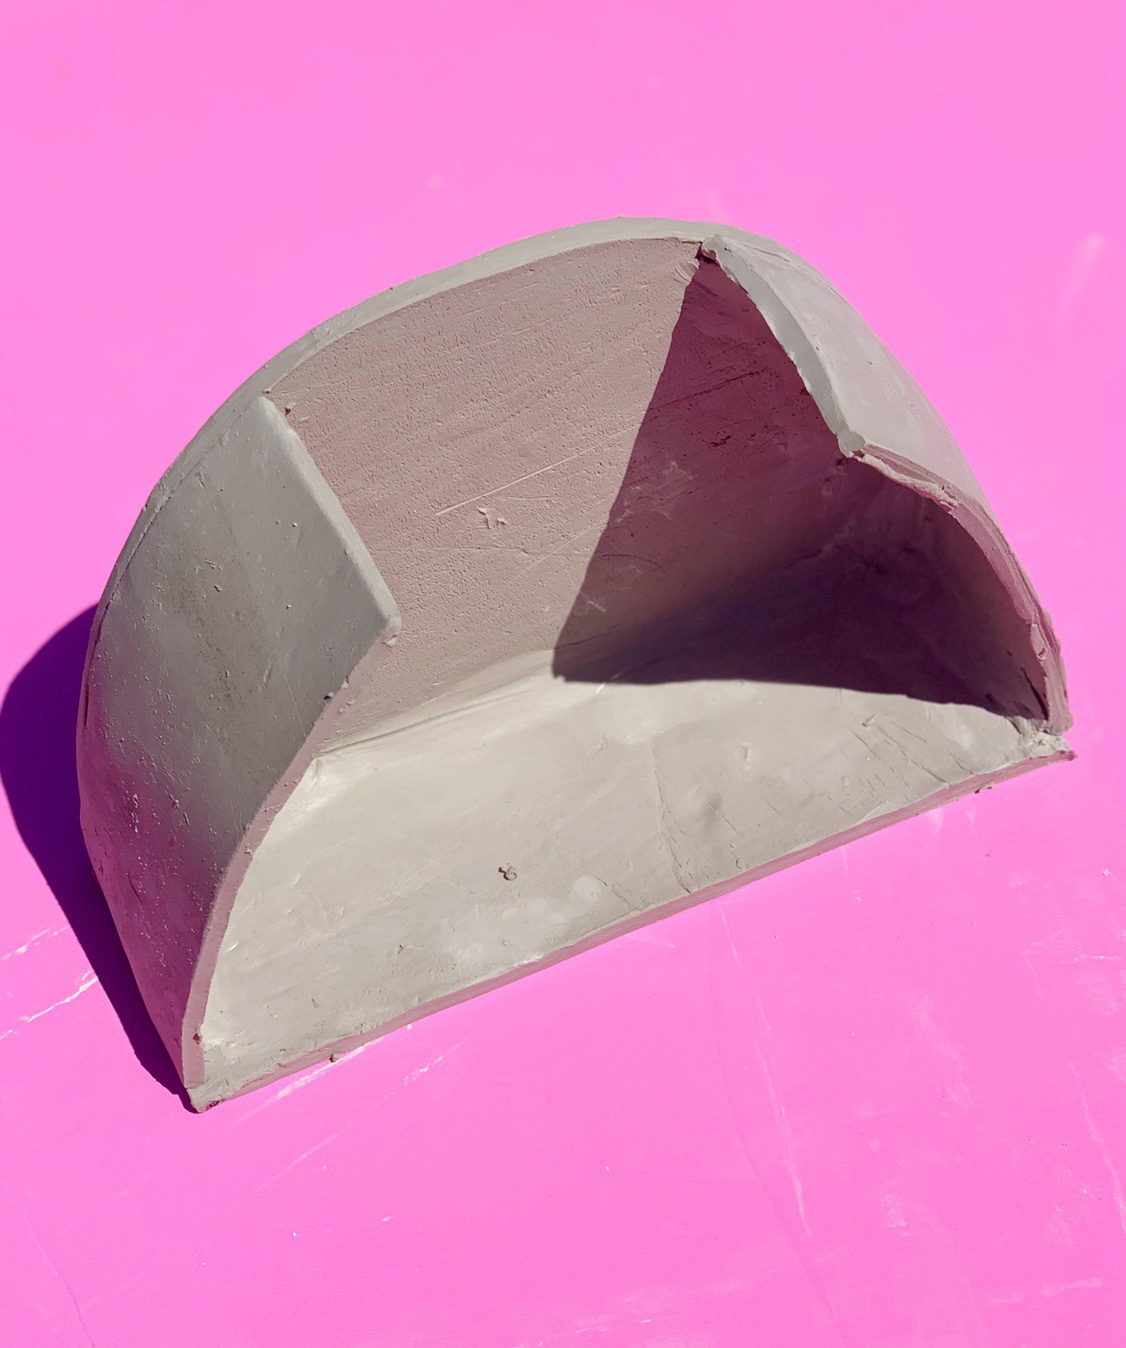
12.) Once you are on your last slab (no matter which side) it will be a little difficult to slip together since you have limited room to access the joining slabs to slip and add clay supports to. Luckily, with the side slabs being the same size as the bottom slab you will have an opening at the top (which will later be where you put your plant in) that you can reach through to help add the support inside. If you believe that you still do not have all the support you wish you did on this last slab, feel free to add additional clay coil supports to the outside of the planter as well. Rather than going between the slabs to add support, you will just add support on the outside of the joining slabs edges. This will add a great amount of support to the outside of your planter, and it will also soften the edges.
13.) Add as much extra support as you wish, and smooth out any imperfections you like.
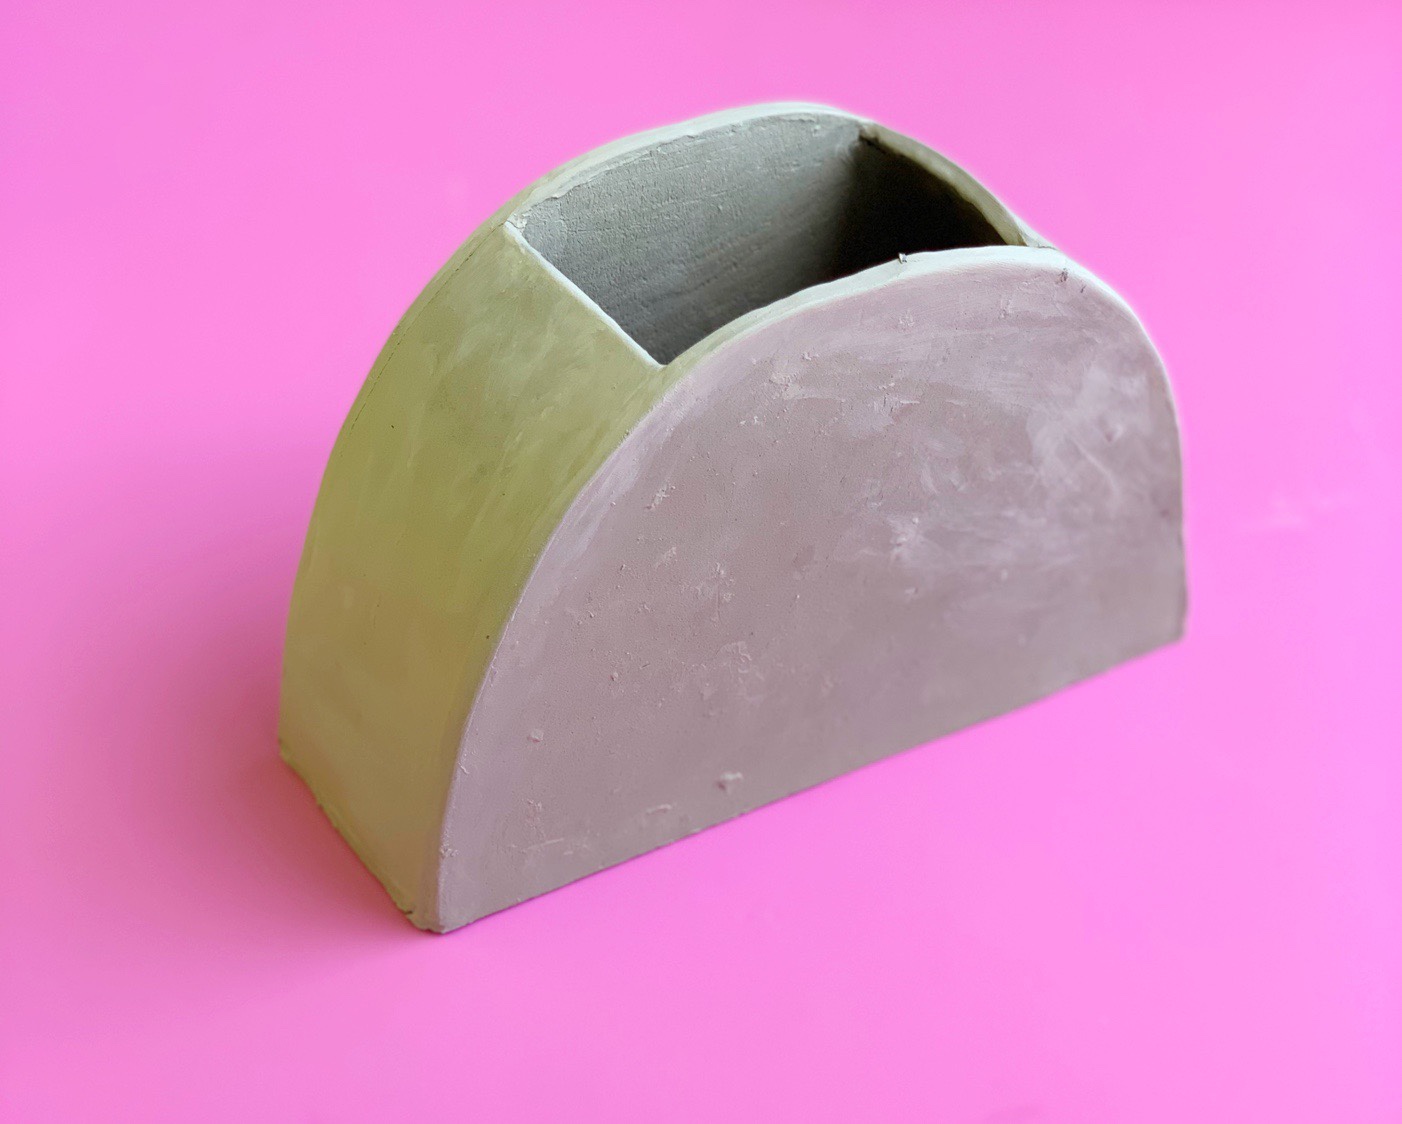
14.) Now that the planter looks exactly as you’d like it to look, allow it to fully dry. With this clay being air dry, rather than a clay that you bake in an oven or a kiln, it may take a bit longer to dry completely. I would give it at least 1 full day to dry in the air, if not longer. As the moisture leaves your clay, it will turn from a medium gray to a light (almost white) gray. Wait for the planter to be bone dry and be white-gray colored.
PHASE 3 – Painting
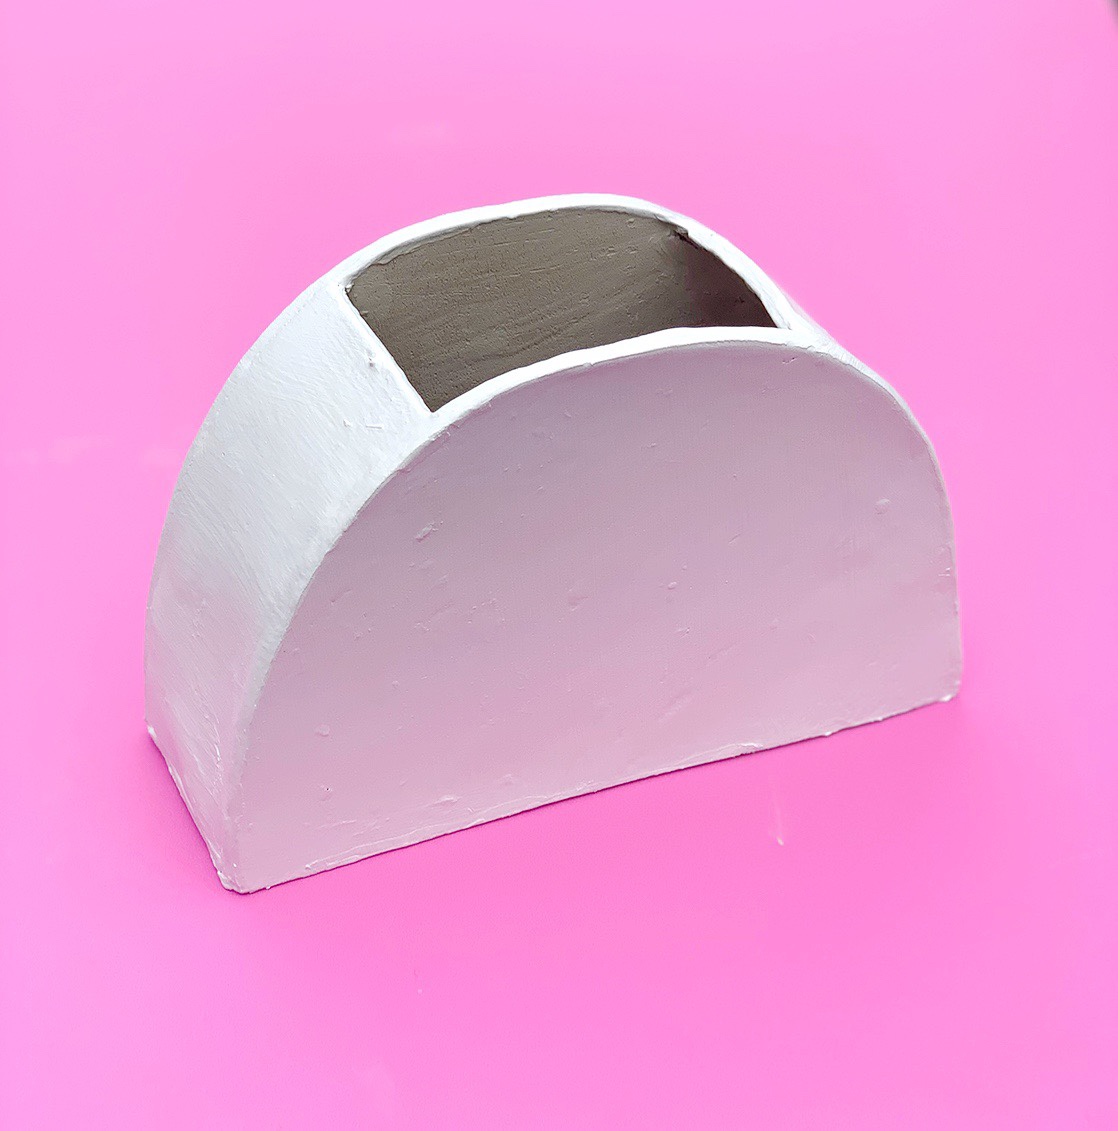
15.) Now that your planter is completely dry, it’s time for the fun part: Painting! The first thing you will want to do is paint a base coat on top of your planter. I used a white primer paint so that it had even coverage and did not need multiple layers to complete. Paint your entire planter in your base coat. This not only gives a more finished look when completed, it also adds a little extra support holding your planter together and giving it more durability.
16.) Once your base coat is dry, the rest is up to you! Use any and every color you would like! And make the brush strokes as thin or as thick as you want them to be. I used 6 colors (pink, orange, mustard, yellow, green, blue).
17.) Allow your paint to fully dry
18.) *OPTIONAL STEP* Now that you paint is dry and your planter is complete, for extra strength and presentation, spray the entire planter (even the inside of it) with acrylic sealer (either gloss or matte). This will help make your planter even more durable and if you choose a gloss sealer it gives it a beautiful glazed finish.
AUBURNARTISAN.COM
Phase 1


Phase 2


Phase 3


I think we can all agree, flowers and rainbows are so colorful, beautiful and fun! Bringing them together inside your home will surely put a smile on your face each and every day!


2 thoughts on “DIY Rainbow Planter”