

You may have seen a few of my piñatas I have made in the past, and I’m sure you were wondering, “when is she going to make a rainbow one?!” Well, the wait is finally over! Here she is!!!! haha!
I wanted to let you know in full disclosure, I have absolutely no plans to use this as an actual piñata and bust it open… Instead I want to keep it for myself! Selfish? Maybe. Understandable? Absolutely!! I mean look how cute it is! Who would want to smash it?! Unless you decide to make one for yourself and smash it.. you do you.
This DIY is going to be a bit of a dumbed-down version since I have put up multiple tutorials of how to create a piñata in the past. I do not want to be too repetitive or redundant, so I won’t go too into detail. But if you have missed my past piñata posts, and need a little more direction, check out my watermelon piñata DIY!

SUPPLIES:
- Rainbow streamers/crepe paper
- Masking Tape
- Scissors
- Marker
- Glue
- Cardboard box
HOW TO:
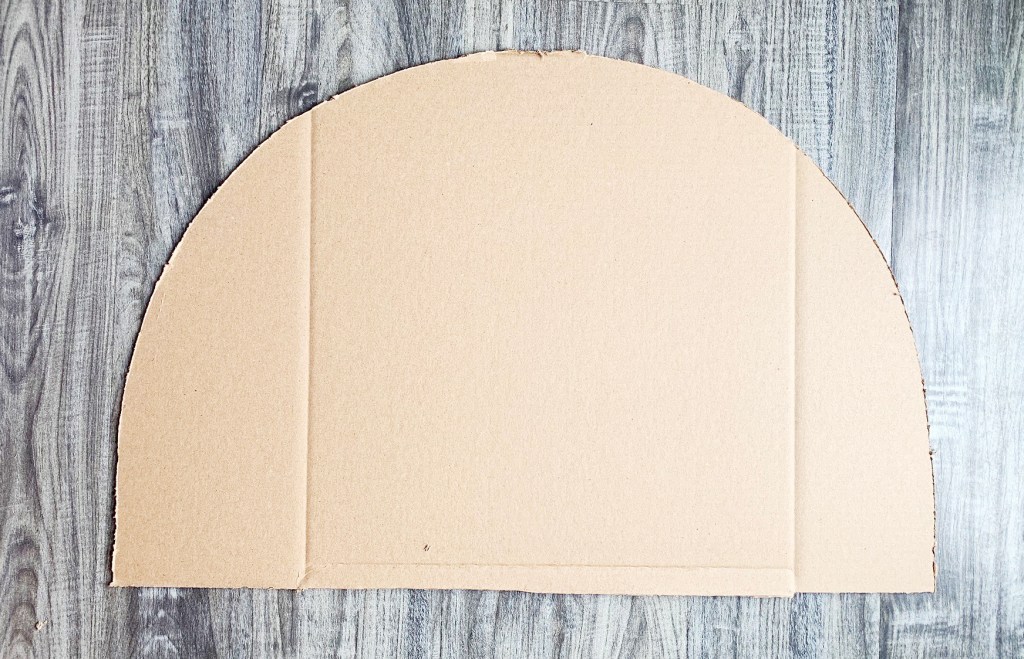
Step 1: Cut out an arch shape from the cardboard. Make your shape as large or as small as you like! I wanted mine to be HUGE so I made it so! haha You can also make your arch as pitched as you like. I made my rainbow a little bit more stout and wide, but you are welcome to make yours a little taller if you like!
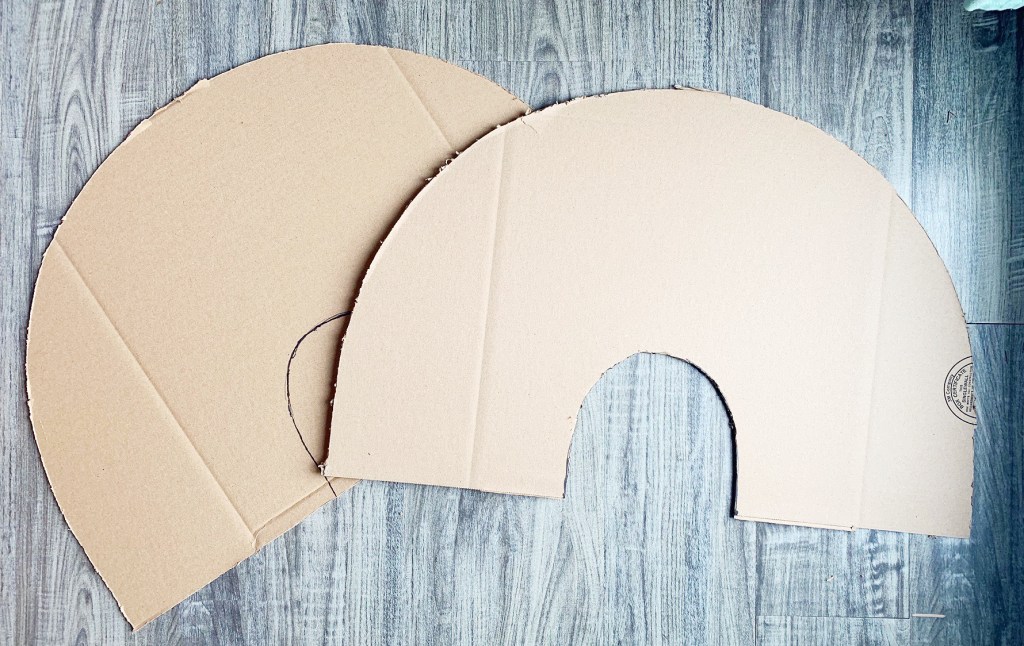
Step 2: Cut an identical shape out of a different piece of cardboard. These will be both faces of the piñata; the front and back.
Step 3: Once you have both arches cut, cut out a mini arch directly in the middle of the flat side of the cardboard. This helps create the bow of the rainbow. 😉 Repeat on both pieces of cardboard.
Step 4: Cut out long, straight strips of cardboard for the sides. Make the piñata as thin or as thick as you like with these strips, but make sure they are all the same height so that when you put it together the piñata is even.
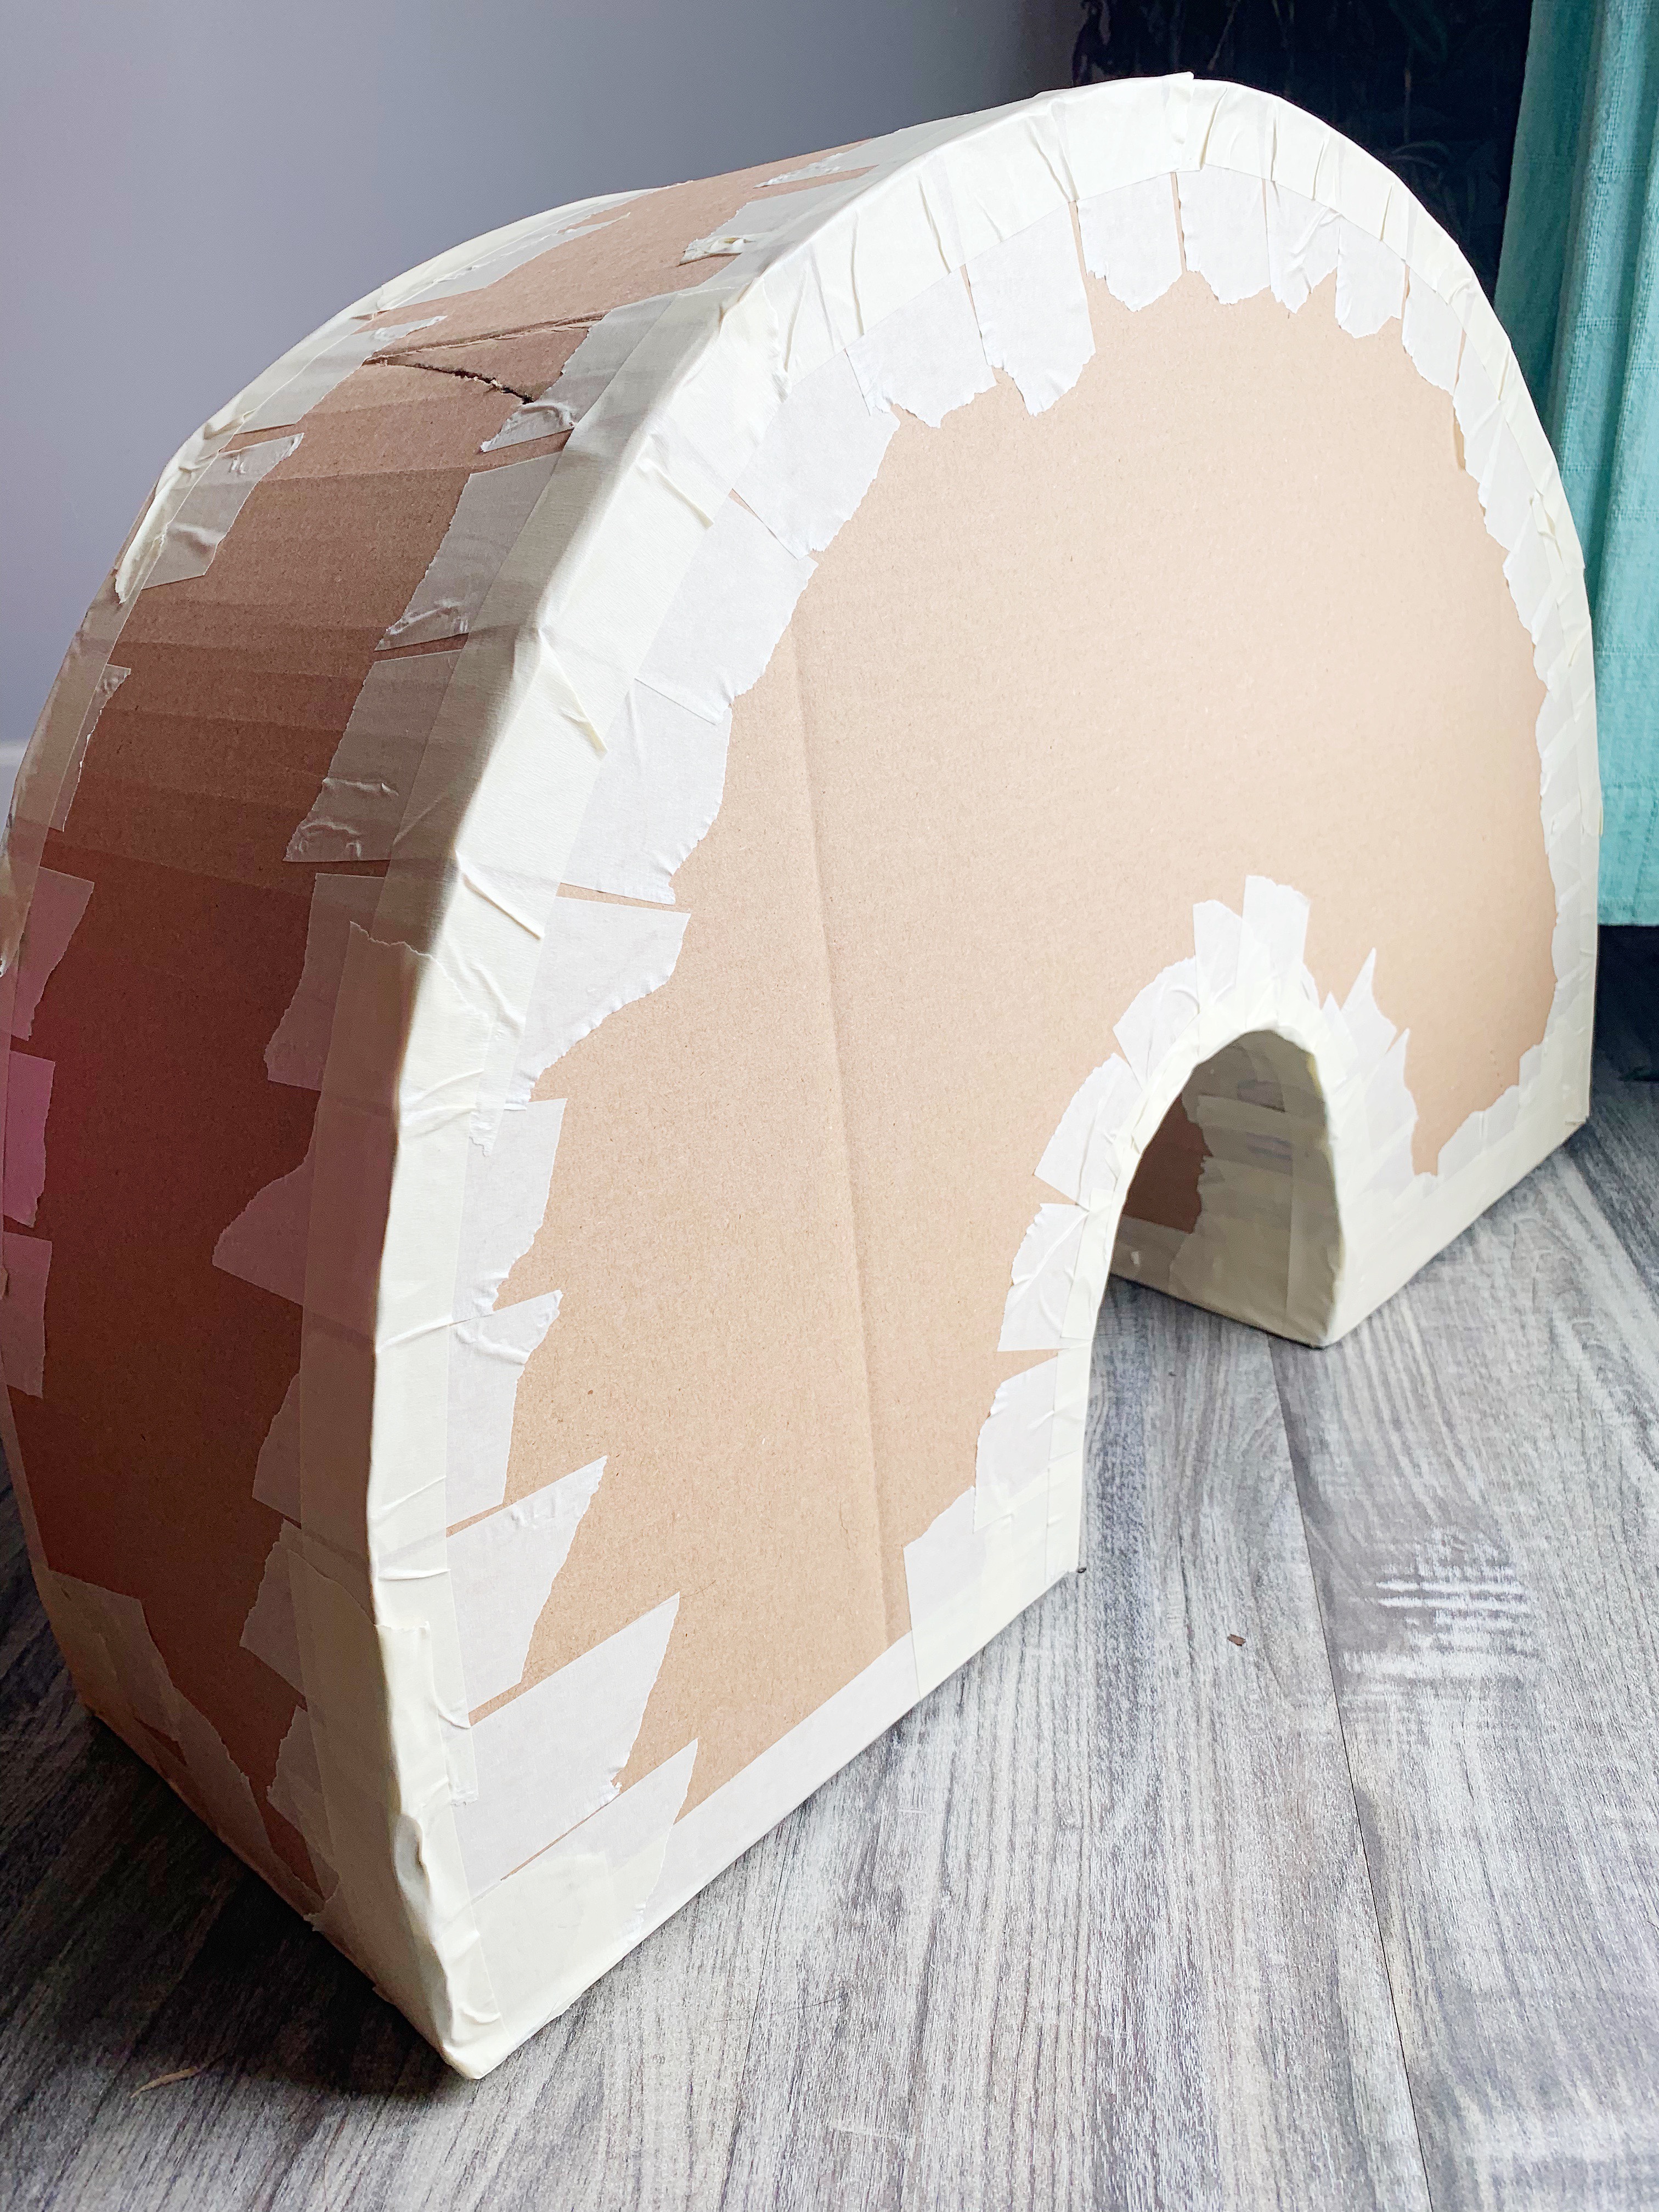
Step 5: Now that you have cut out the sides, it’s time to tape it all together! Remember, I am planning on keeping mine for a long time, so I used a lot of tape! If you are planning on using the piñata as intended, I would suggest less. I tend to make my piñatas a little TOO strong, and it takes forever to bust them! So, less tape, more destructibility! Is that a word?
(This is the point where it may be helpful to check out my watermelon DIY if you need more help!)
Once you have all the sides taped together, you will have a perfect 3D rainbow shape!


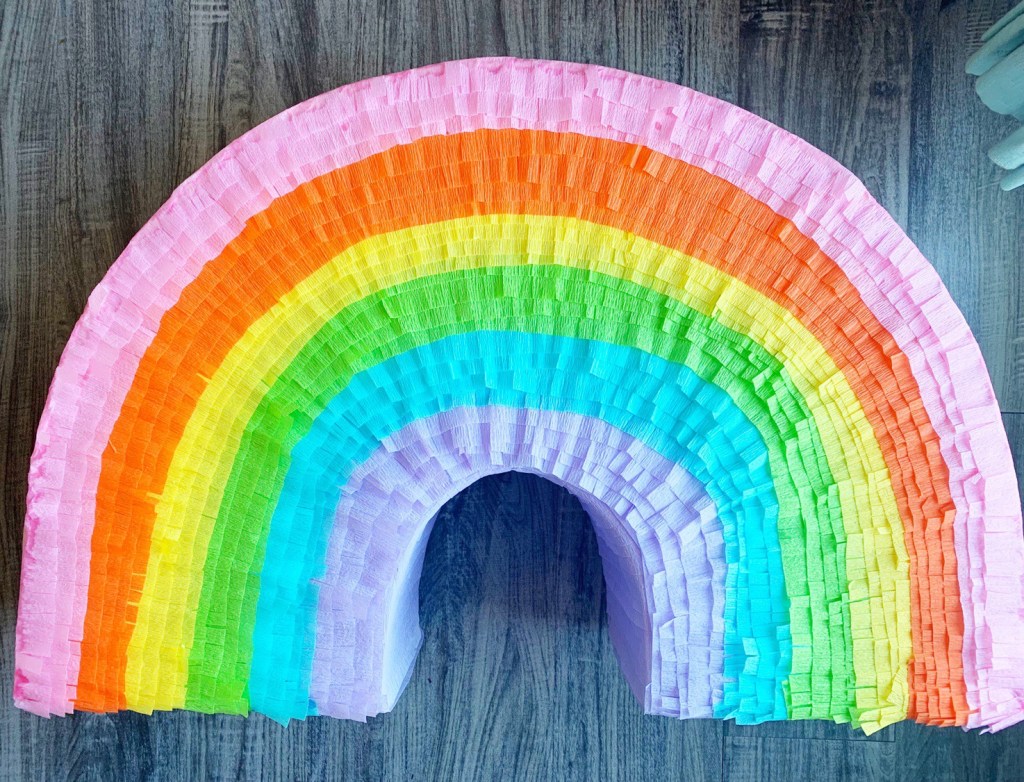
Step 6: Fringe your streamers/crepe paper. This is by far the most tedious task in the whole process, but I think it really does make all the difference! You want it to look authentic, don’t you?!
Step 7: Once you have your streamers fringed, its time to glue it on! Start at the bottom of your piñata above the mini arch, and work your way up! Layering on top of each not only makes it look full, but covers up the glue that is left from the previous layer! Streamers/crepe paper are very thin material, so the second glue touches it you can see it. Making the layers as close to each other and overlapping helps prevent seeing the glue underneath.
Step 8: Now that you have one side done, let it dry COMPLETELY (overnight is what I did) and then flip it over and repeat step 7 on the other side.
Step 9: Now that both the faces are covered, its time to finish the sides! I chose to use a solid color all the way up the side, but you are welcome to make colored layers just as you did on the front!
Step 10: LOVE IT!!! Or destroy it… up to you… But I am choosing to love mine! haha!!
I can just picture this displayed somewhere in my art studio… once we finally buy a house.. haha!! For now, I have no idea where it is going to go. All I know is I won’t let anyone touch it!!! ha!


One thought on “DIY Rainbow Piñata”