

Two things I have been obsessing over lately are needle felting and berets, so I figured, why not combine them?! Find out how to make your own below!
One of my favorite artists of all time is Dani Ives. Her fiber creations are out of this world! (Here is a link to check out her website for yourself) When I saw she was hosting a “Painting With Wool” class in Cincinnati, I nearly died!! I set my alarm for the ticket release and as soon as it was time I booked my seat!
I booked ONE seat.
JUST FOR ME.
I am a relatively shy person (I like to consider myself an introverted extrovert) so the fact that I was willing to go alone, means I really was excited for it!
Her class was nothing short of amazing and I learned A LOT about needle felting! One of the things I learned, was how much skill it takes to create her masterpieces. Skill I am sure I will never possess. But don’t let that scare you! I am going to summarize what she taught me and teach you all in a way that aligns with my skillset haha
Without further ado, here is how you needle-felt you own beret!
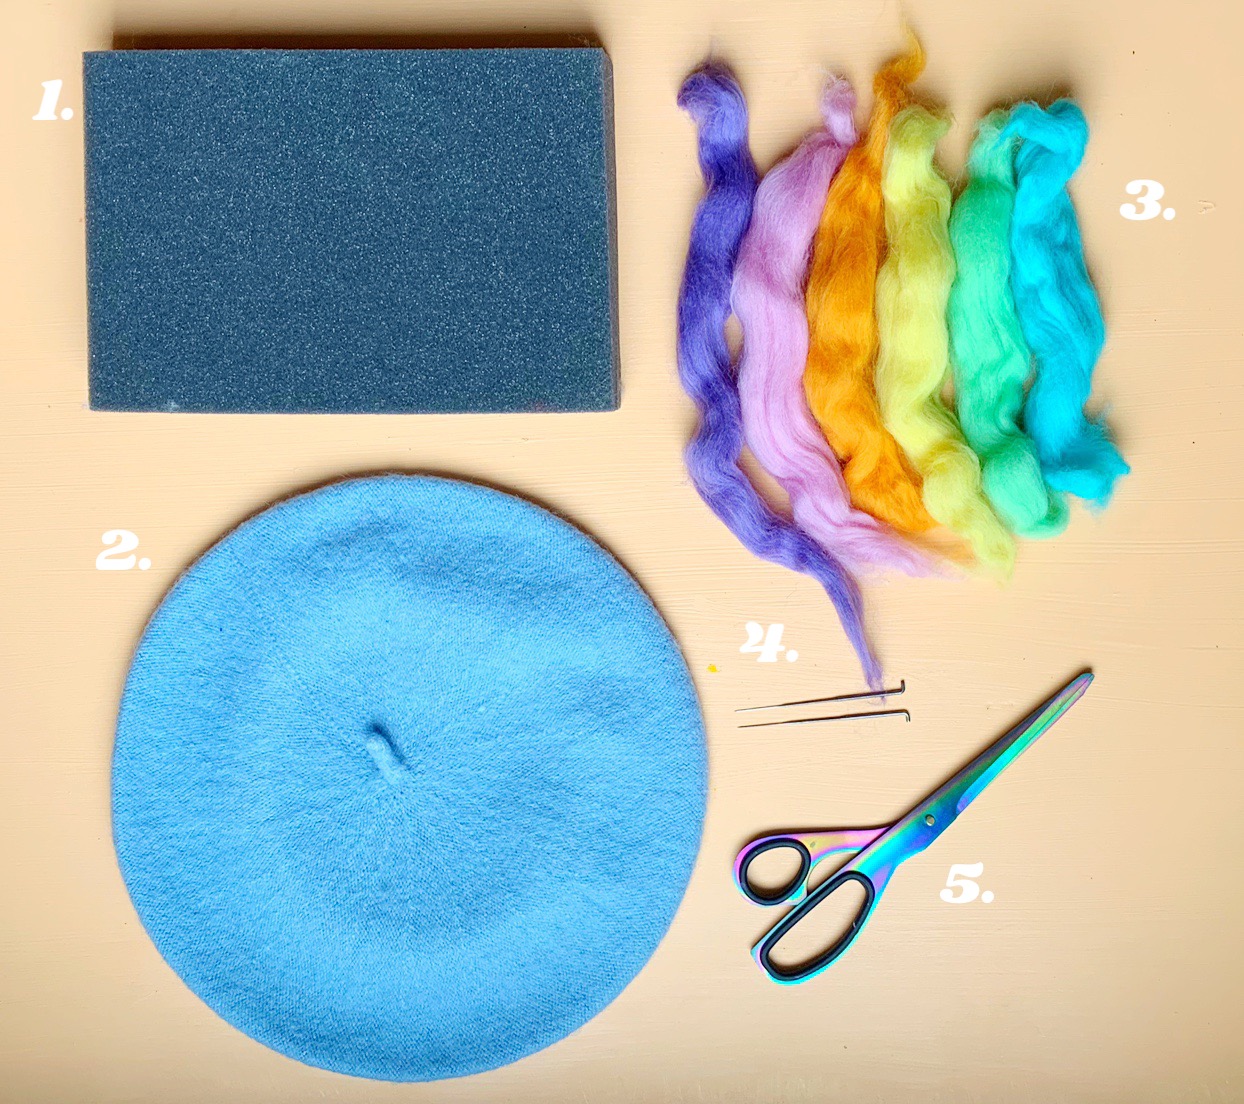
SUPPLIES
- Needle Felting Foam Pad
- Wool Beret
- Felting Wool
- Felting Needles
- Scissors
- *Marker
*optional supplies

Step One: Decide what design you would like to needle felt onto the beret. Possibilities are endless! Want a smile face? Sure! Want a detailed portrait of your cat? But of course! (this just happens to take a lot more skill) I opted for a rainbow design (go figure) and used my absolute favorite sweater for a bit of color inspiration!
Step Two: Sketch the design onto the beret. This step is technically optional. If you think you can free hand where you want everything, so be it! I just don’t trust myself to stick to the original plan if I don’t sketch it out first. But, you do you!
Step Three: Place the felting foam inside the opening of the beret. This will not only act as a support system for your beret, you will also need the foam for the wool to be able to be packed into place.
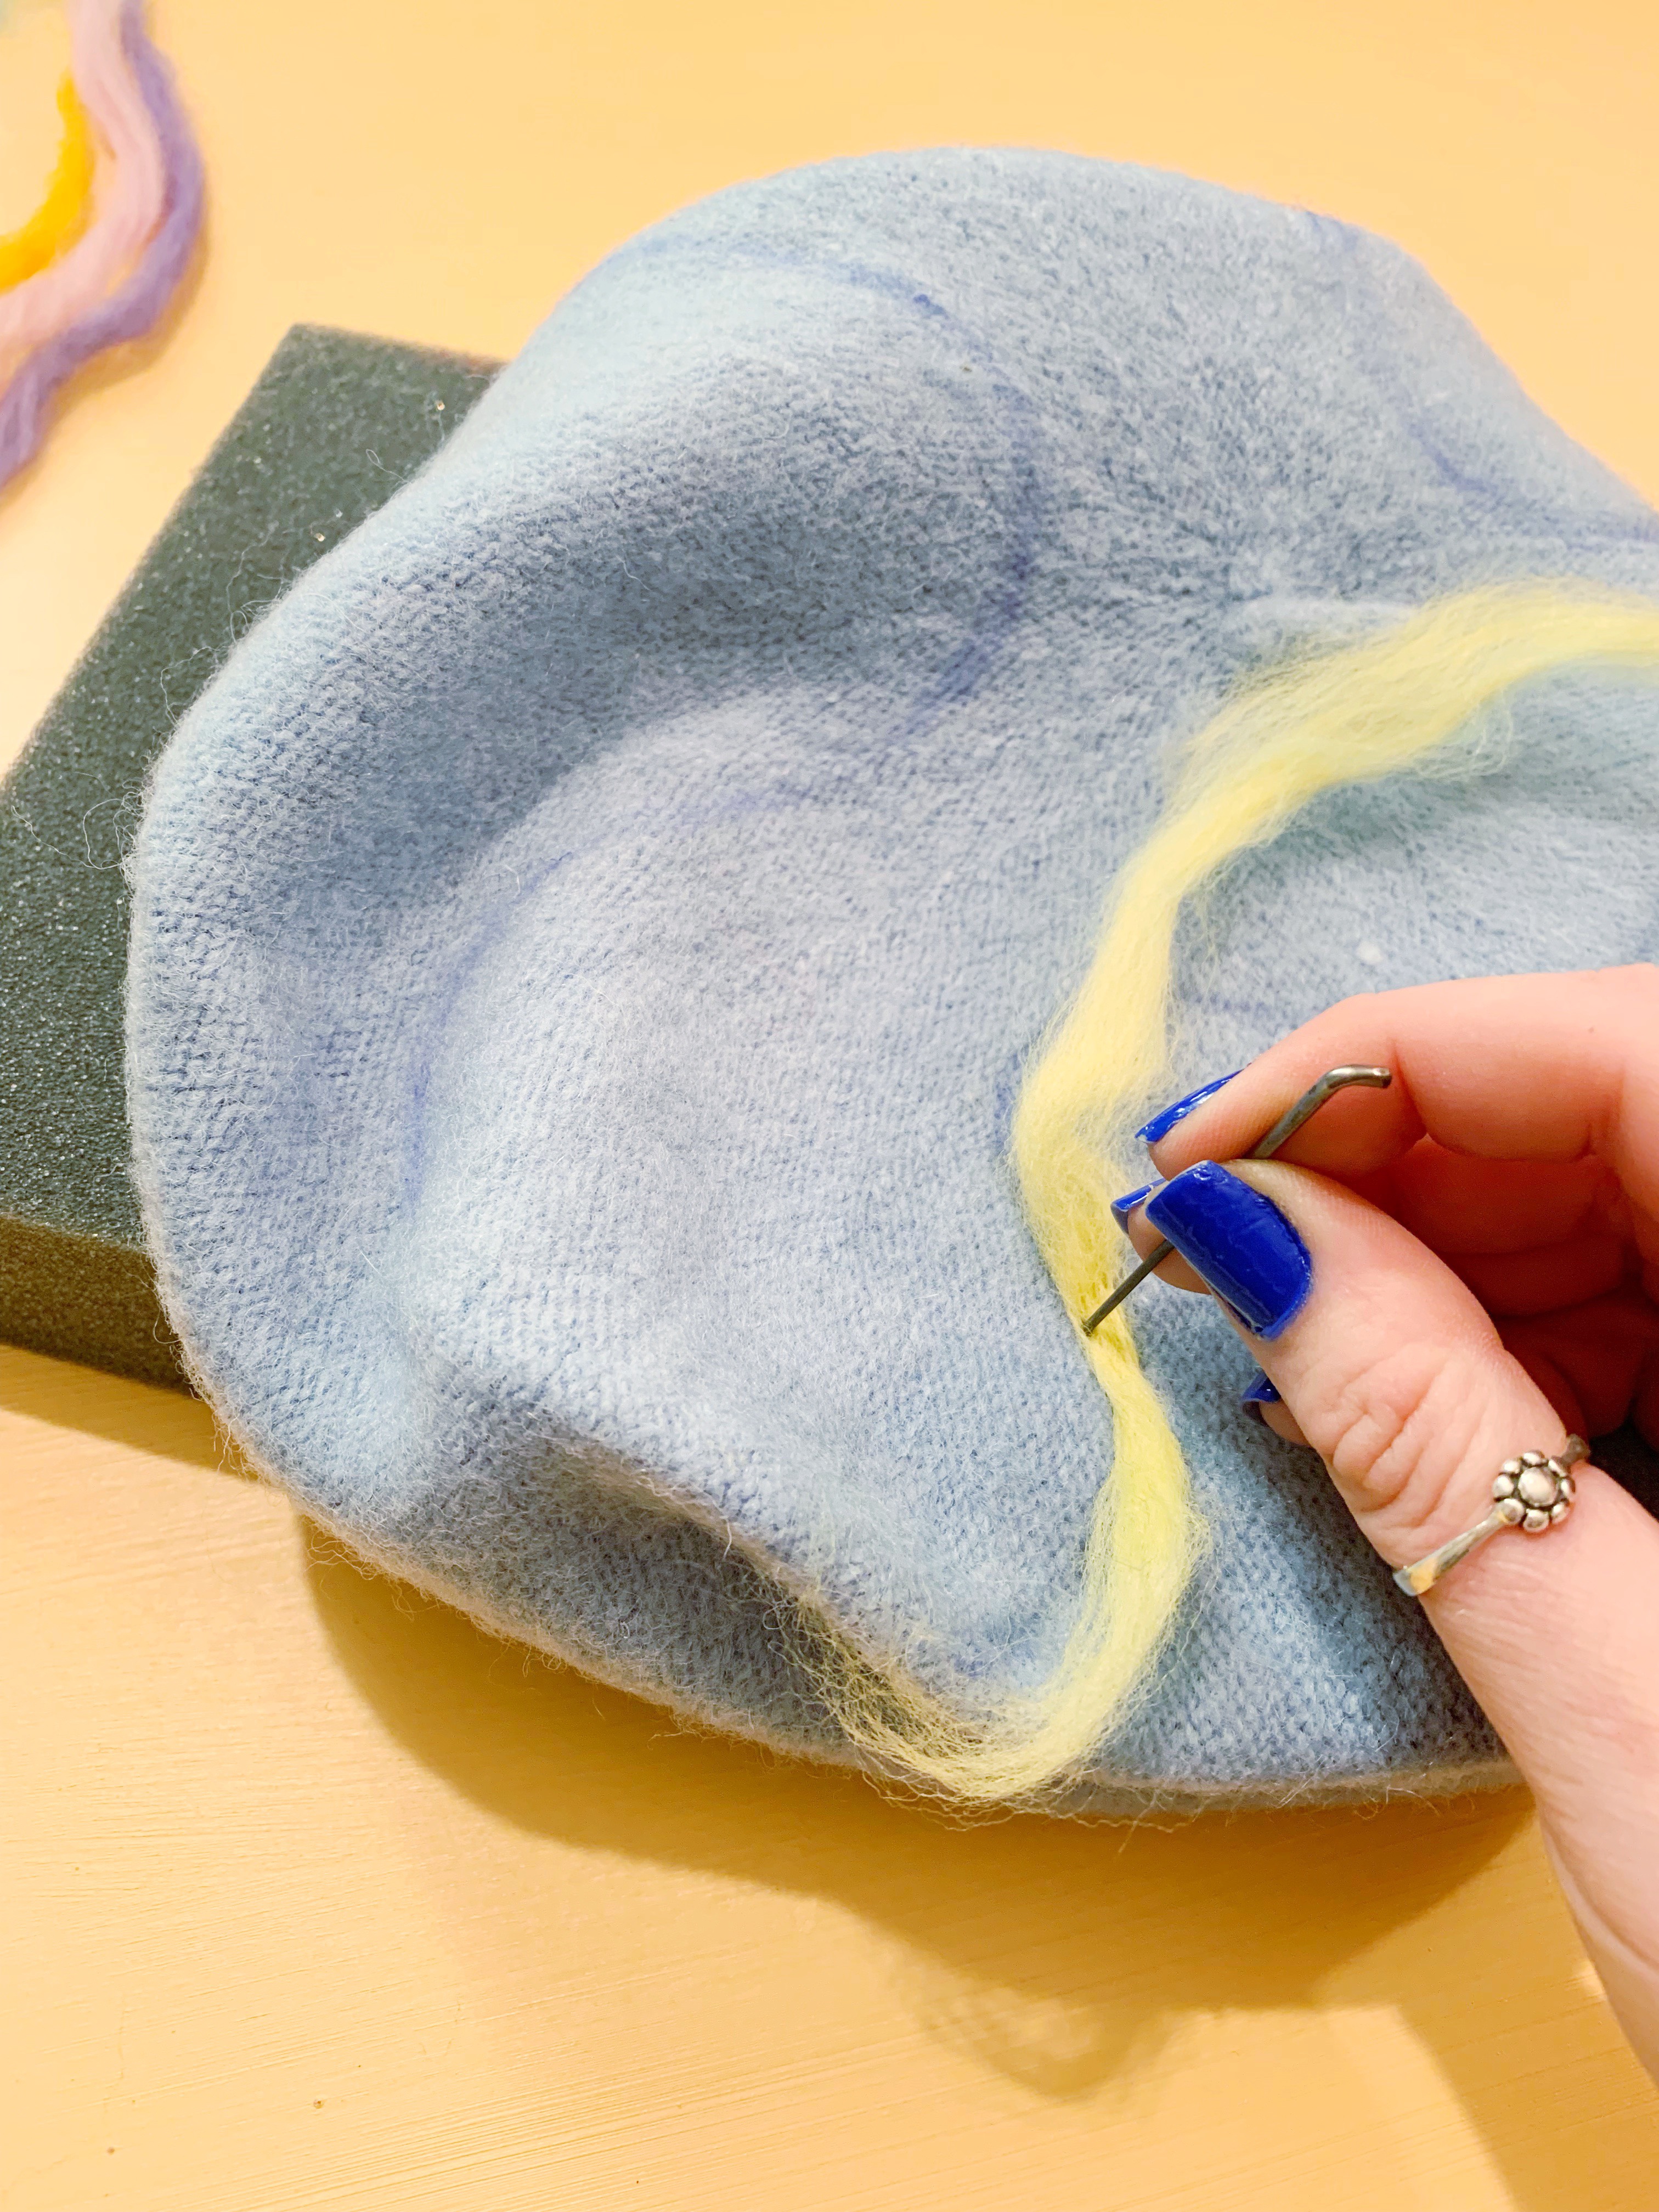
Step Four: Once you have decided your design (and possibly sketched it on the beret) and have decided your color pallet, take the wool and place the first layer on the beret where you would like to begin. For my design, to keep the sides even and everything in line, I decided to start with the middle-most color in my design. (Which happened to be yellow) I lined the yellow wool along the line I sketched out so that it was easy to follow. At this point, you can also decide how thick or thin you would like your lines or designs to be.
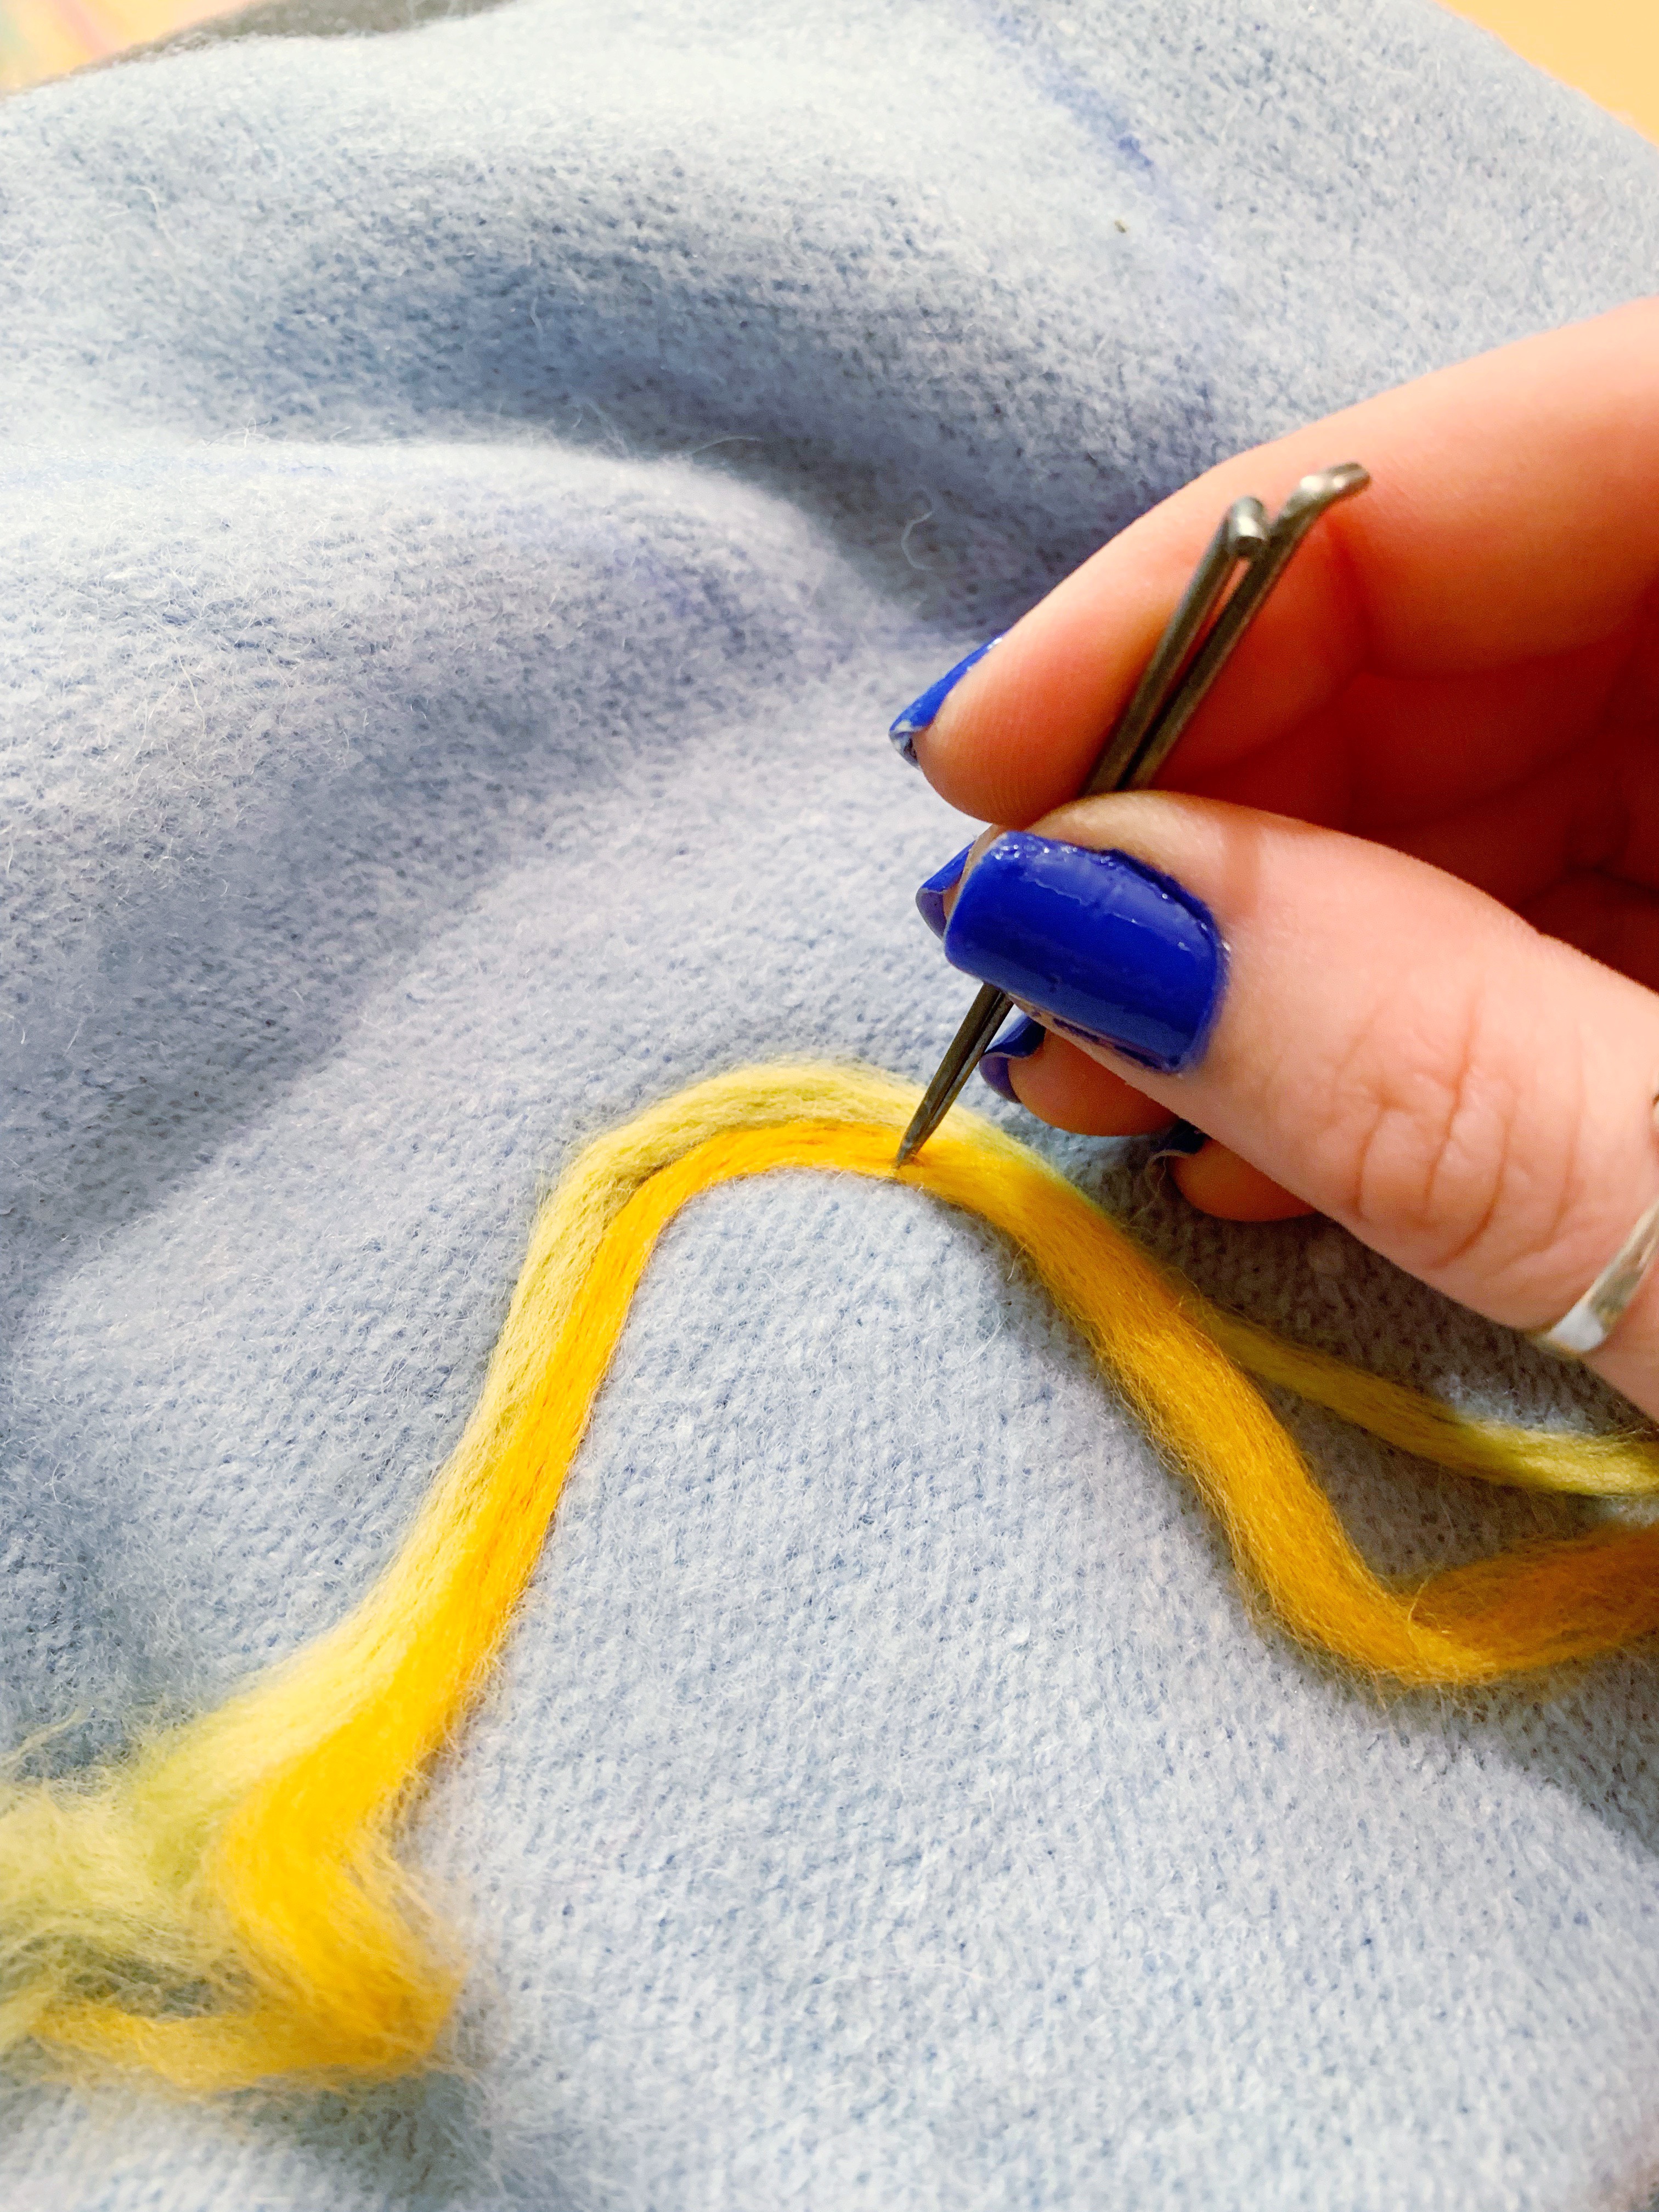
Once you have the wool right where you want it, take a felting needled and start stabbing the needle through the wool, the beret and into the felting foam. The deeper you stab, the more secure the wool is on your beret. You will have to repetitively stab the wool along the line until all sections are the same depth and connected to the beret. A little hack that Dani taught us in our class was, in a section where you have a lot of wool to press down together you can take two needles at once and stab them in. This covers a greater surface area and it helps speed up the process. And it is super simple to hold both needles at once since they are so small.
*If you mess up at all during the process, needle felting is VERY forgiving! Just rip out the last section you just stabbed and it will be removed from the design!
Step Five: Now that your first part of the design is in place, it is time to continue your pattern or picture! With mine, I took the next color in line and placed it below the line I had just made, that way everything is cohesive. Continue to stab the wool just as you did before until completion.

Step Six: Continue step four and five until your design is completely finished! Remember to always stab each area a little extra if in doubt. It is better if it is more finely packed in than if it is loosely packed. Loose areas could mean that the wool may get completely detached. Like I mentioned before, needle-felting is a very forgiving medium. It is great in that if you mess up it is easy to fix. But that also means it is easy to accidentally pull out places you didn’t mean to. So pack it in or risk pulling it out!
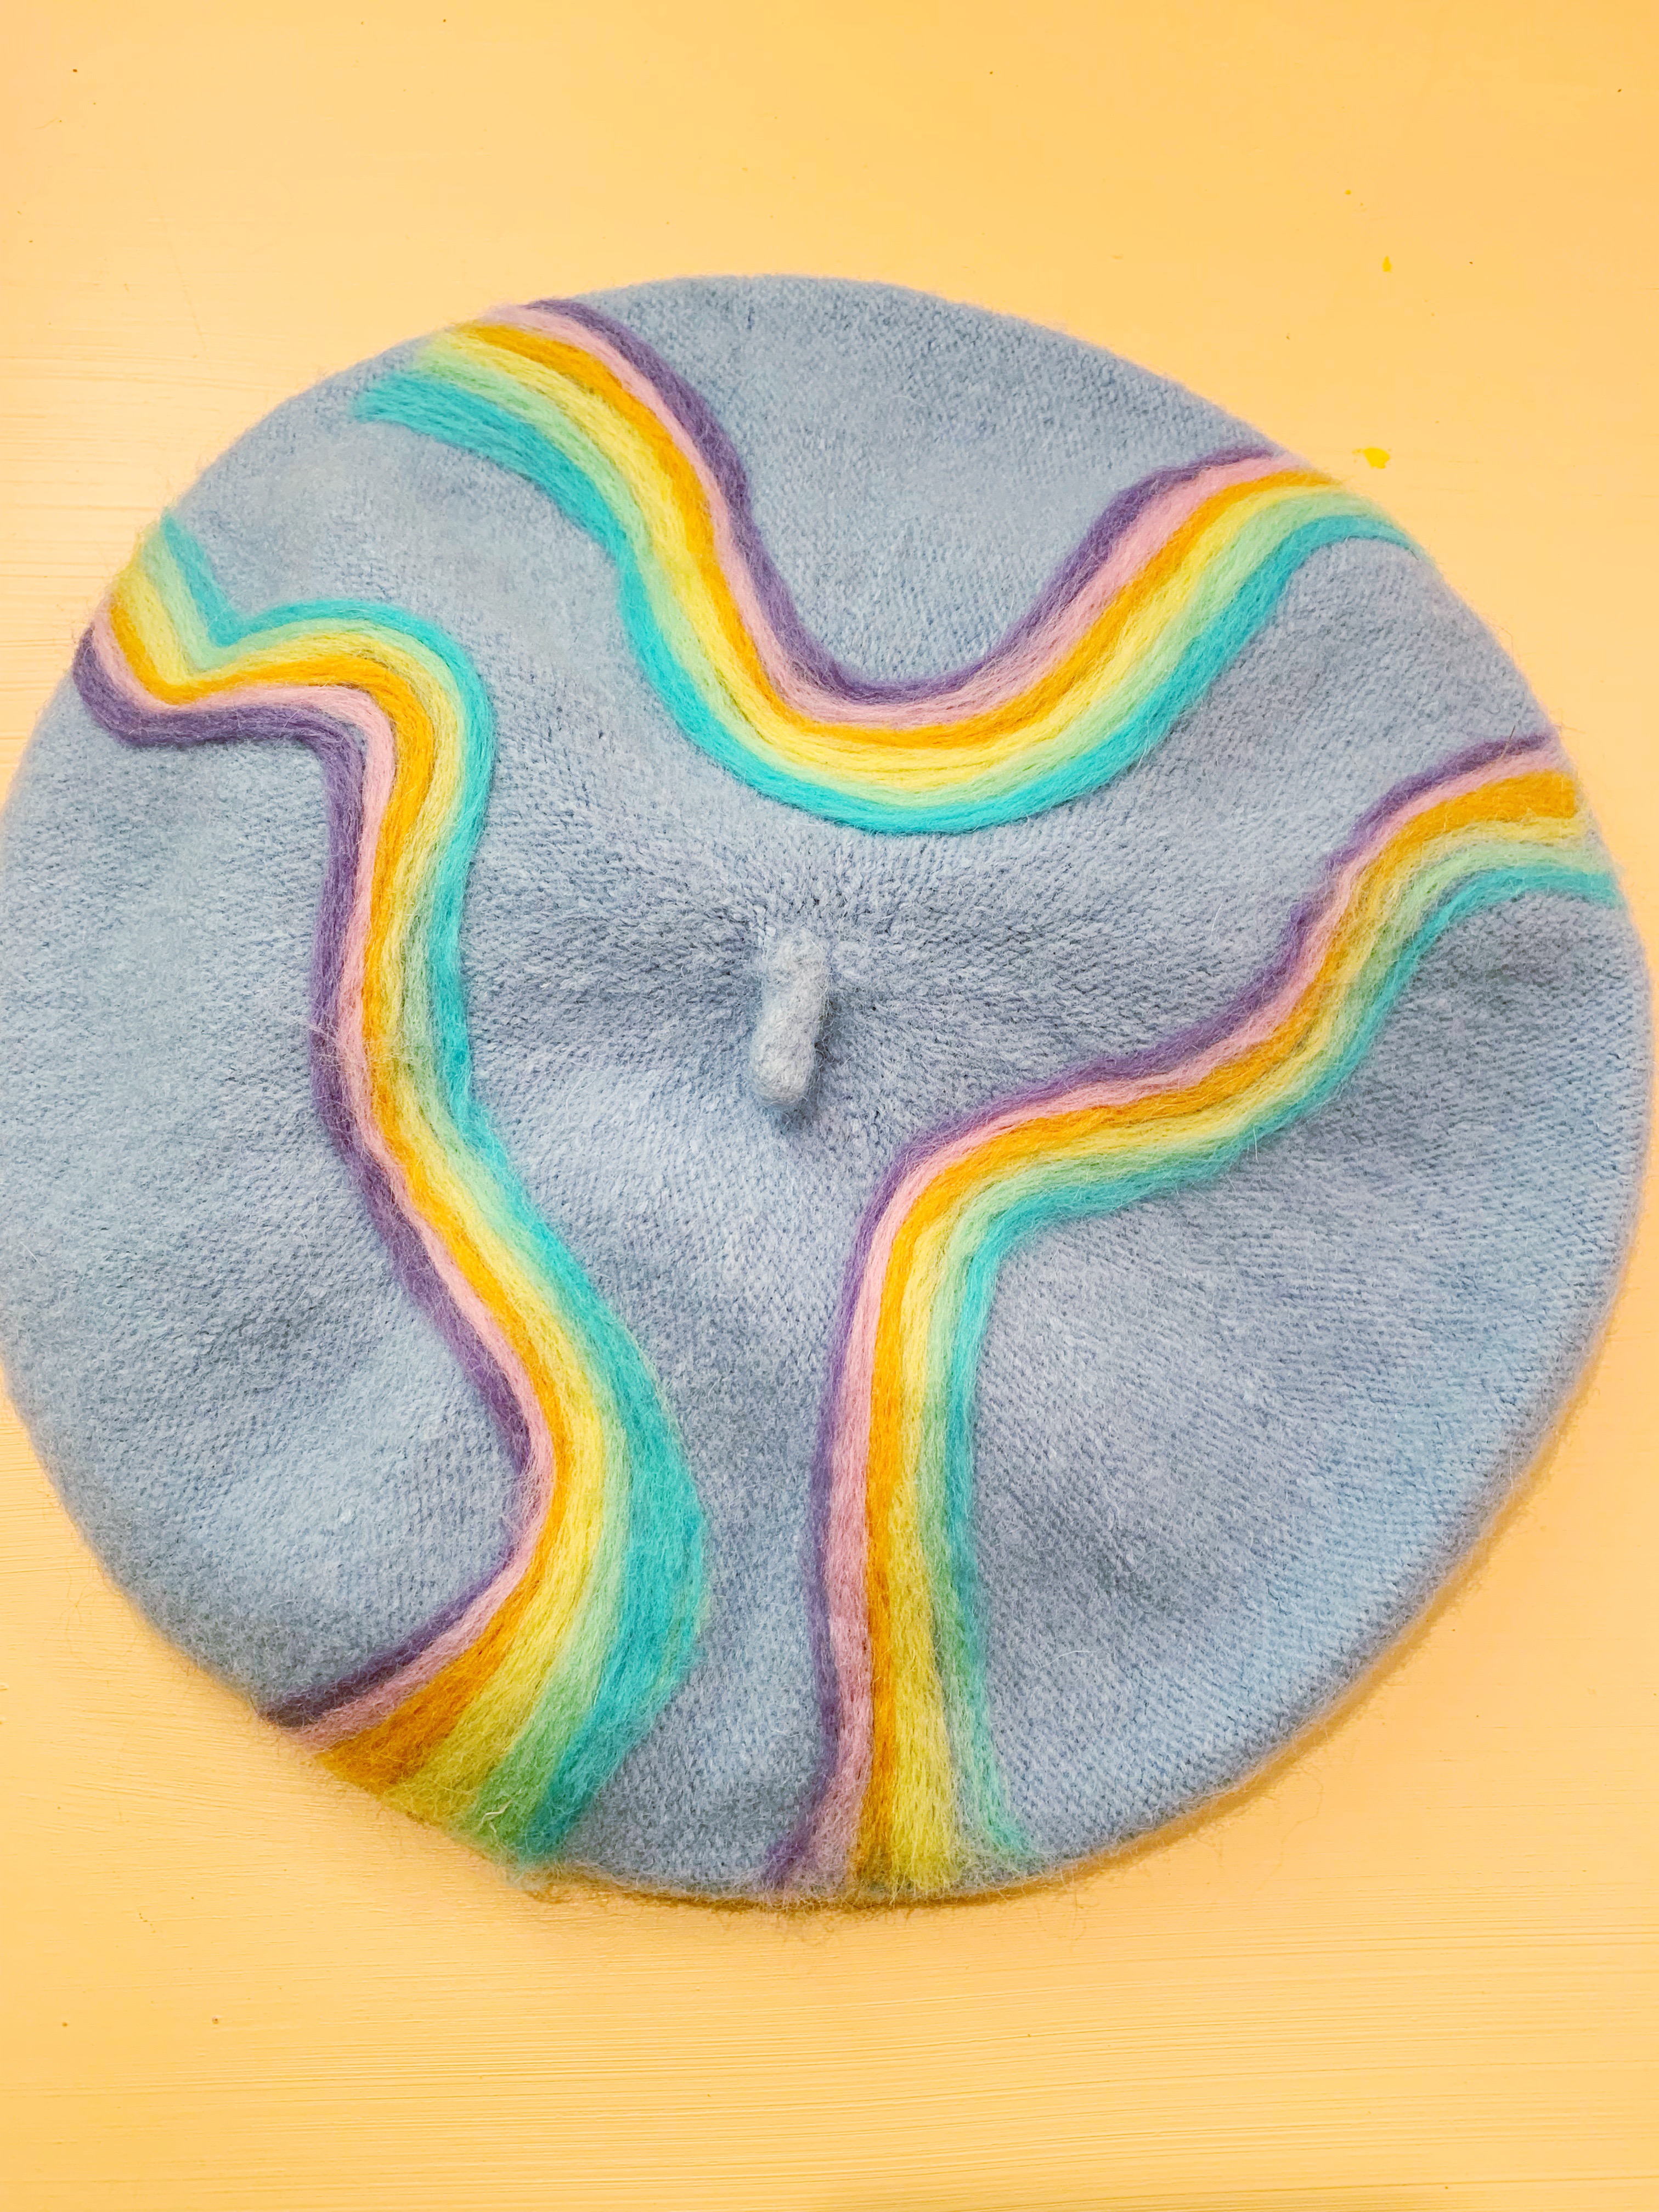
Step Seven: Now that your design is completely finished (and looks beautiful), it is time to remove the beret from the foam. Don’t worry! There will be a bit of resistance when you remove the beret from the foam. Since you stabbed the wool deep into the foam, it is semi-connected to the beret. But a little tug and you will get the beret free from the foam completely intact. There will be little remnants of the wool stuck into the foam, but that is totally normal! It just means you did a good job at stabbing the wool deep into the beret and foam!
Step Eight: This is also an optional step, but I think it is a good one to mention! Once your design is complete and free from the foam, for extra support to ensure the wool will not come out, you can iron it down. If you want this extra assurance, take your beret and turn it inside out. Iron over the little fibers that are sticking out of the bottom of the beret. Pressing them down with the iron helps ensure they cannot slip out.


Step Nine: Turn your hat right-side out and ROCK IT!
Step Ten: Make sure you are ready for all the compliments, and be prepared how to tell them how to make their own! 😉

3 thoughts on “DIY Needle Felted Beret”