

Name a more iconic duo. I’ll wait. Ahh! I am soooo excited to finally share this Pixar costume DIY with you today! It has been a long time in the making, and plans have changed throughout the process, but I am still just so happy I was finally able to make these iconic characters come to live this Halloween!

The Luxo lamp and Luxo ball are the most iconic objects within the Pixar universe, and as a Pixar-lover I knew I had to make them become a reality! If you have seen ANY Pixar film, you have seen these little guys at some point! The Luxo lamp is featured in the opening Pixar sequence where it hops over and jumps up and down on the “I” in Pixar until the letter deflates. The Luxo ball has made numerous appearances in most of the Pixar movies, but is most notable in the Toy Story films.


But what makes these cute little objects so special? Both objects appeared in Pixar’s FIRST ever short, “Luxo Jr.” The short was about two lamps (Luxo Sr. and Luxo Jr.) playing with the iconic ball. Luxo Jr. tries to balance itself on the ball and ends up popping it. But don’t worry, Luxo Jr was able to find a new, much larger ball, to play with in the end of the short. Luxo Jr. debuted in 1986 and was so far ahead of its time.
“Luxo Jr. was not only ground breaking for Pixar but for the entire industry. It was won an Academy Award for Best Animated Short Film and it was the first computer-animated film to be nominated for an Academy Award. It has also been selected for preservation in the National Film Registry due to its “cultural, historical and aesthetical significance.” Luxo Jr. introduced the world to not only the Luxo Ball and lamp, but to a way of animation that paved the way for Pixar to become the company it is today.”
Vocal.Media
This short little film helped launch the Pixar empire into what it is now! So, paying a tribute to Pixar’s origins seemed just so special to me.
I have been planning this costume for SO long (it has been saved in my notes on my phone for like 3 years!) and honestly have just been too intimidated to even try! But this year I was like “I am finally going to do it!! AND I am going to make it a DIY blog!” Okay, I must admit, I grossly overestimated my abilities to make this DIY actually do-able… the lamp part anyway! If you follow me on Instagram, you may have seen in my stories that chaotic catastrophe I made out of cardboard. Yep, that was this lamp costume. The head piece to be precise. If you don’t follow me on Instagram, let me just tell you, it was a HOT MESS and looked insane! I started everything with a moderately simple plan of action, but when the cardboard would just not work with me I ended up, well, getting creative.
Okay, okay, now I am just rambling.. That is all my long-winded way of saying that unfortunately I am unable to give you an *accurate* DIY on how to recreate the Luxo lamp. My original plans did not turn out how I thought they would (as things often do) so I was left kind of jerry-rigging everything together to get the lamp to be what I wanted it to be. Thus, there really is no possible way to describe how I got this costume to look the way it does now from how it started. (Obviously lots of cardboard and duct tape and tears)
BUT, I am still able to show you how to make the Luxo ball! (because luckily all my plans stayed on track for this one)! So if you would like to just go as the Luxo ball for Halloween, this is perfect! If you would like to create the duo on your own, I believe in you!

PIXAR Ball Costume
Supplies:
– Newspaper
– School Glue
– Water
– 36″ Balloon
– Paint (Blue and Red)
– Spray Paint (Yellow)
– Ribbon (Yellow)
– Duct Tape
Instructions:
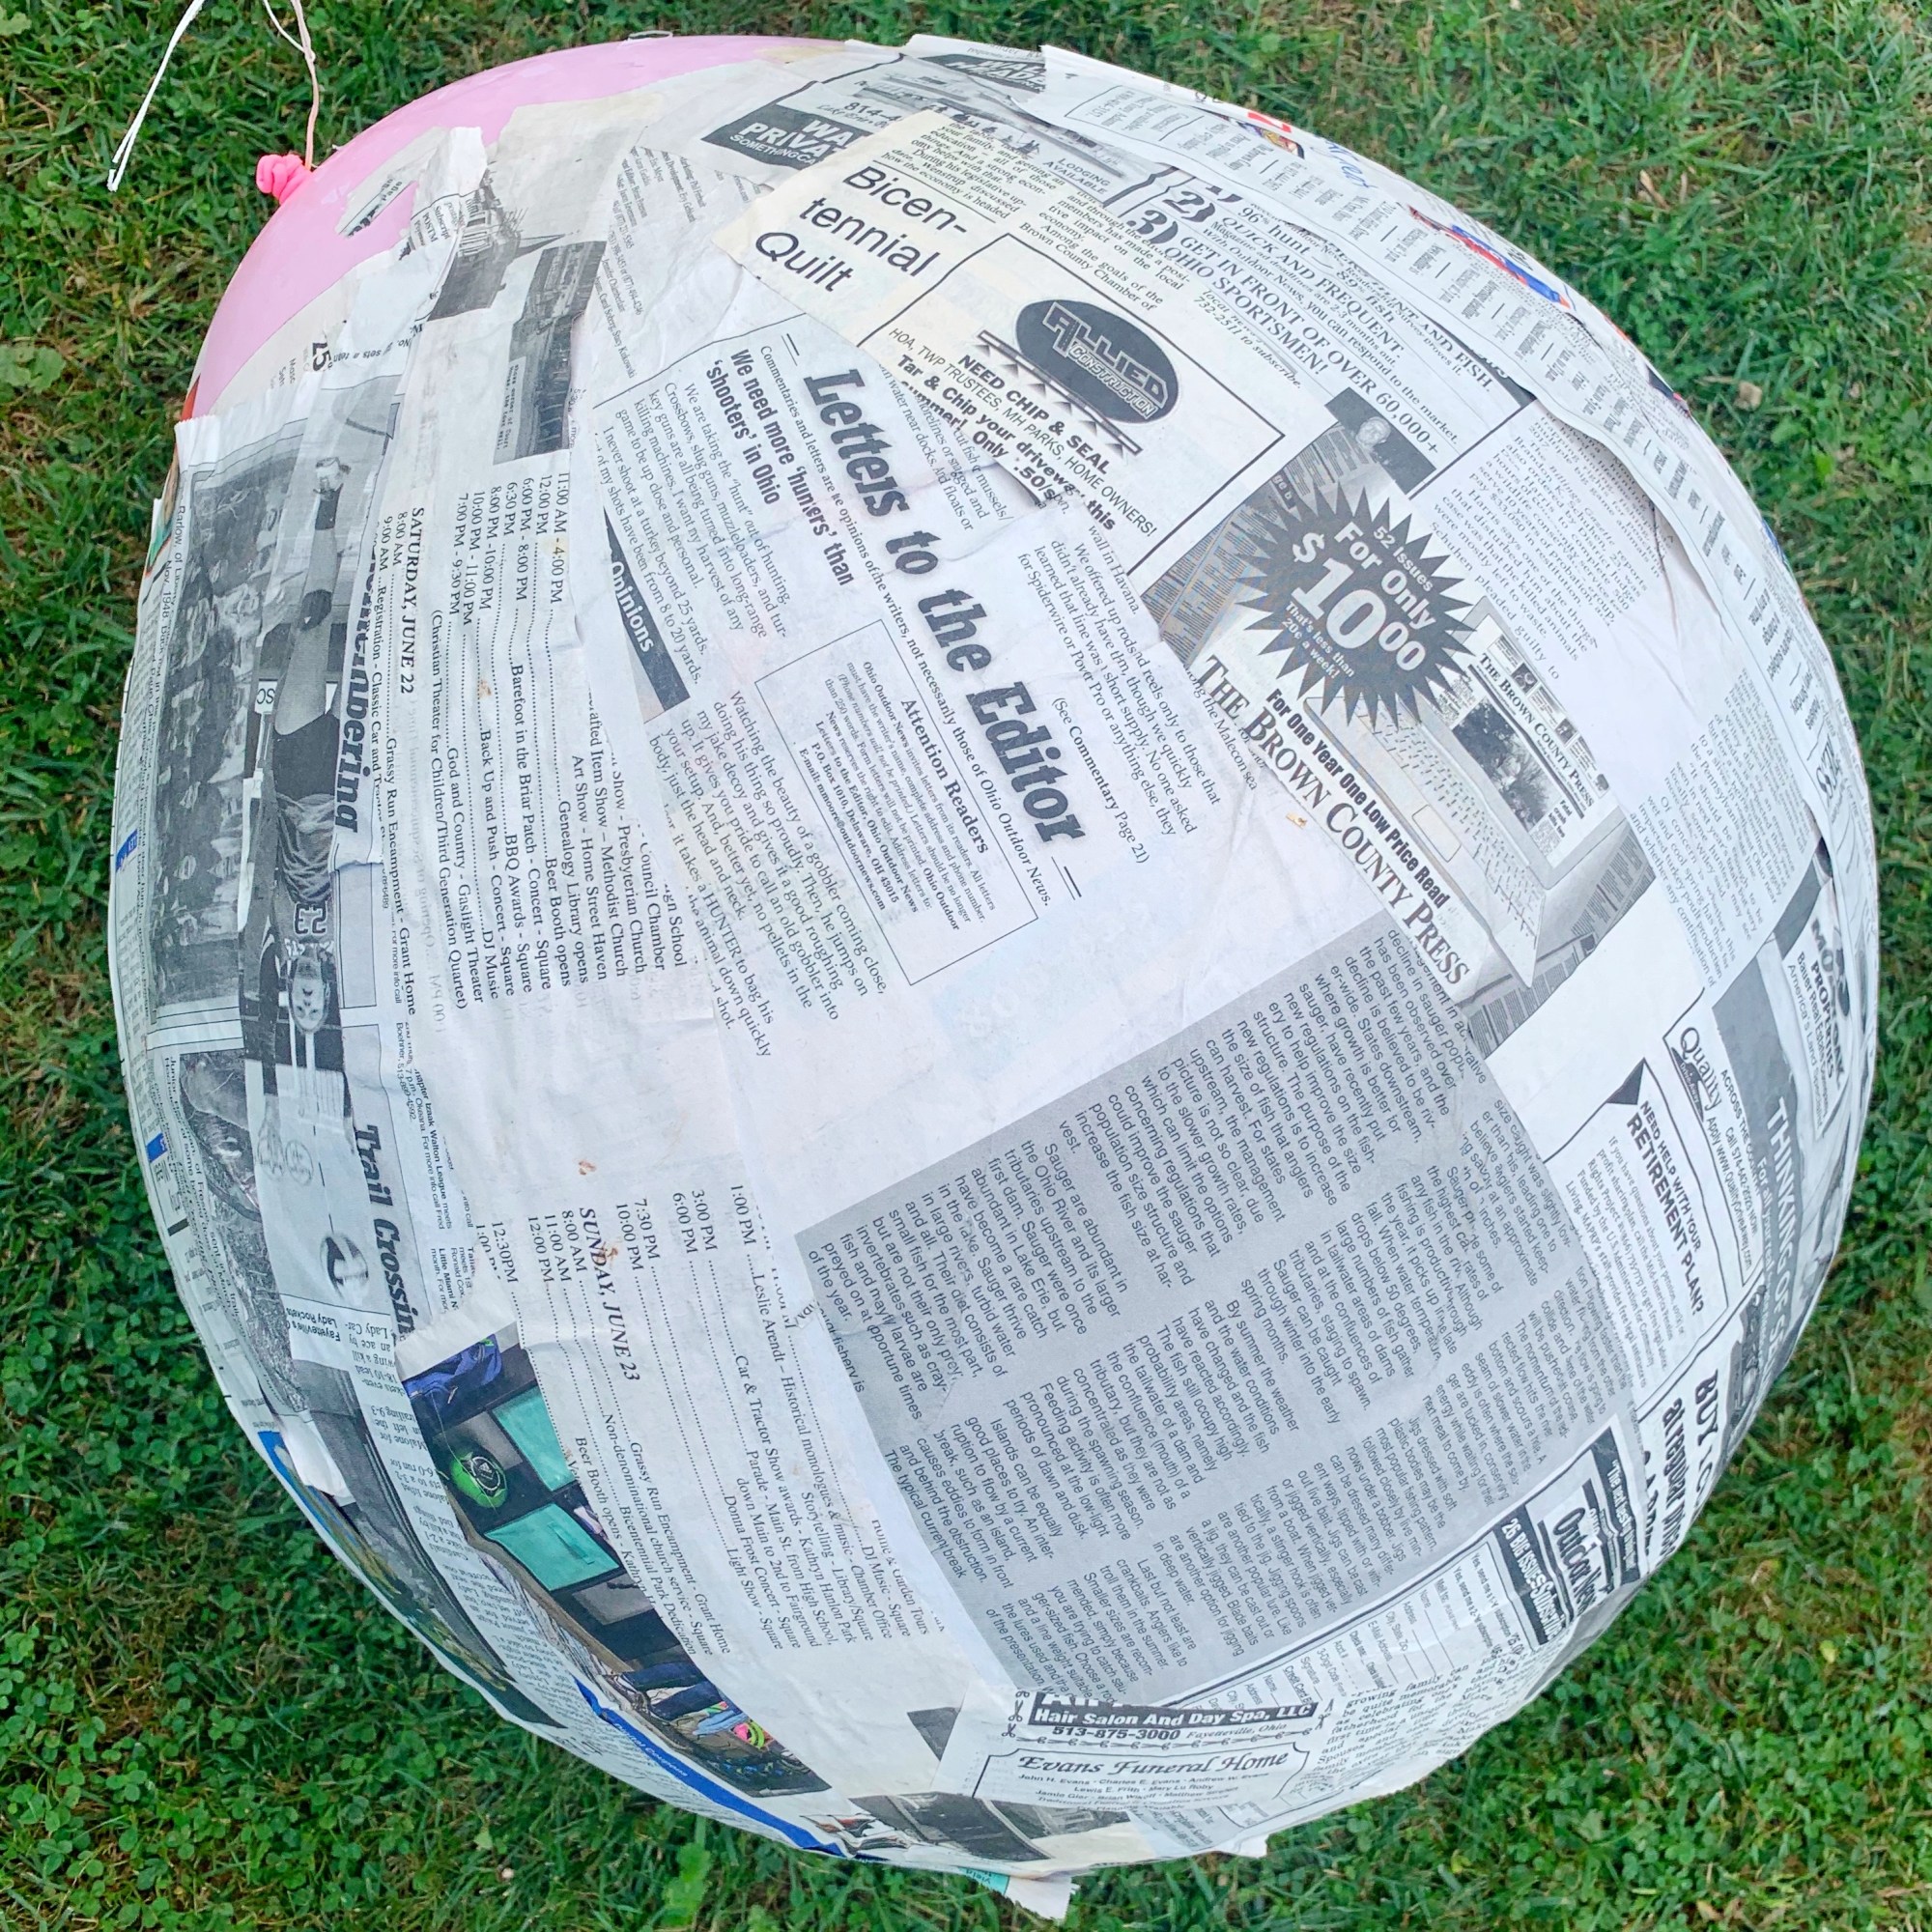
1.) The first thing we will need to do is prep! Inflate your 36″ balloon to its full capacity and set aside. Next, take your newspaper and cut it into 1 1/2″ strips and set aside. Finally, you will make your papier-mâché paste. To do this, combine your glue and water (1:1 ratio) in a large bowl or bucket. Mix together until fully incorporated.
2.) Now that you have all of your supplies ready to go, take your newspaper strips and dip them into the glue mixture. Make sure to completely saturate the paper with the glue so that the full piece will stick. Then remove any access glue on the paper by running it through your fingers. Take the strips and lie it vertically along the outside of the balloon. Leaving a bit of a gap at the bottom and top of the balloon. Lay one strip of newspaper at a time all the way around the balloon. Allow to dry completely. Repeat this process as many times as you like. I did 4 layers so that the ball was nice and sturdy.
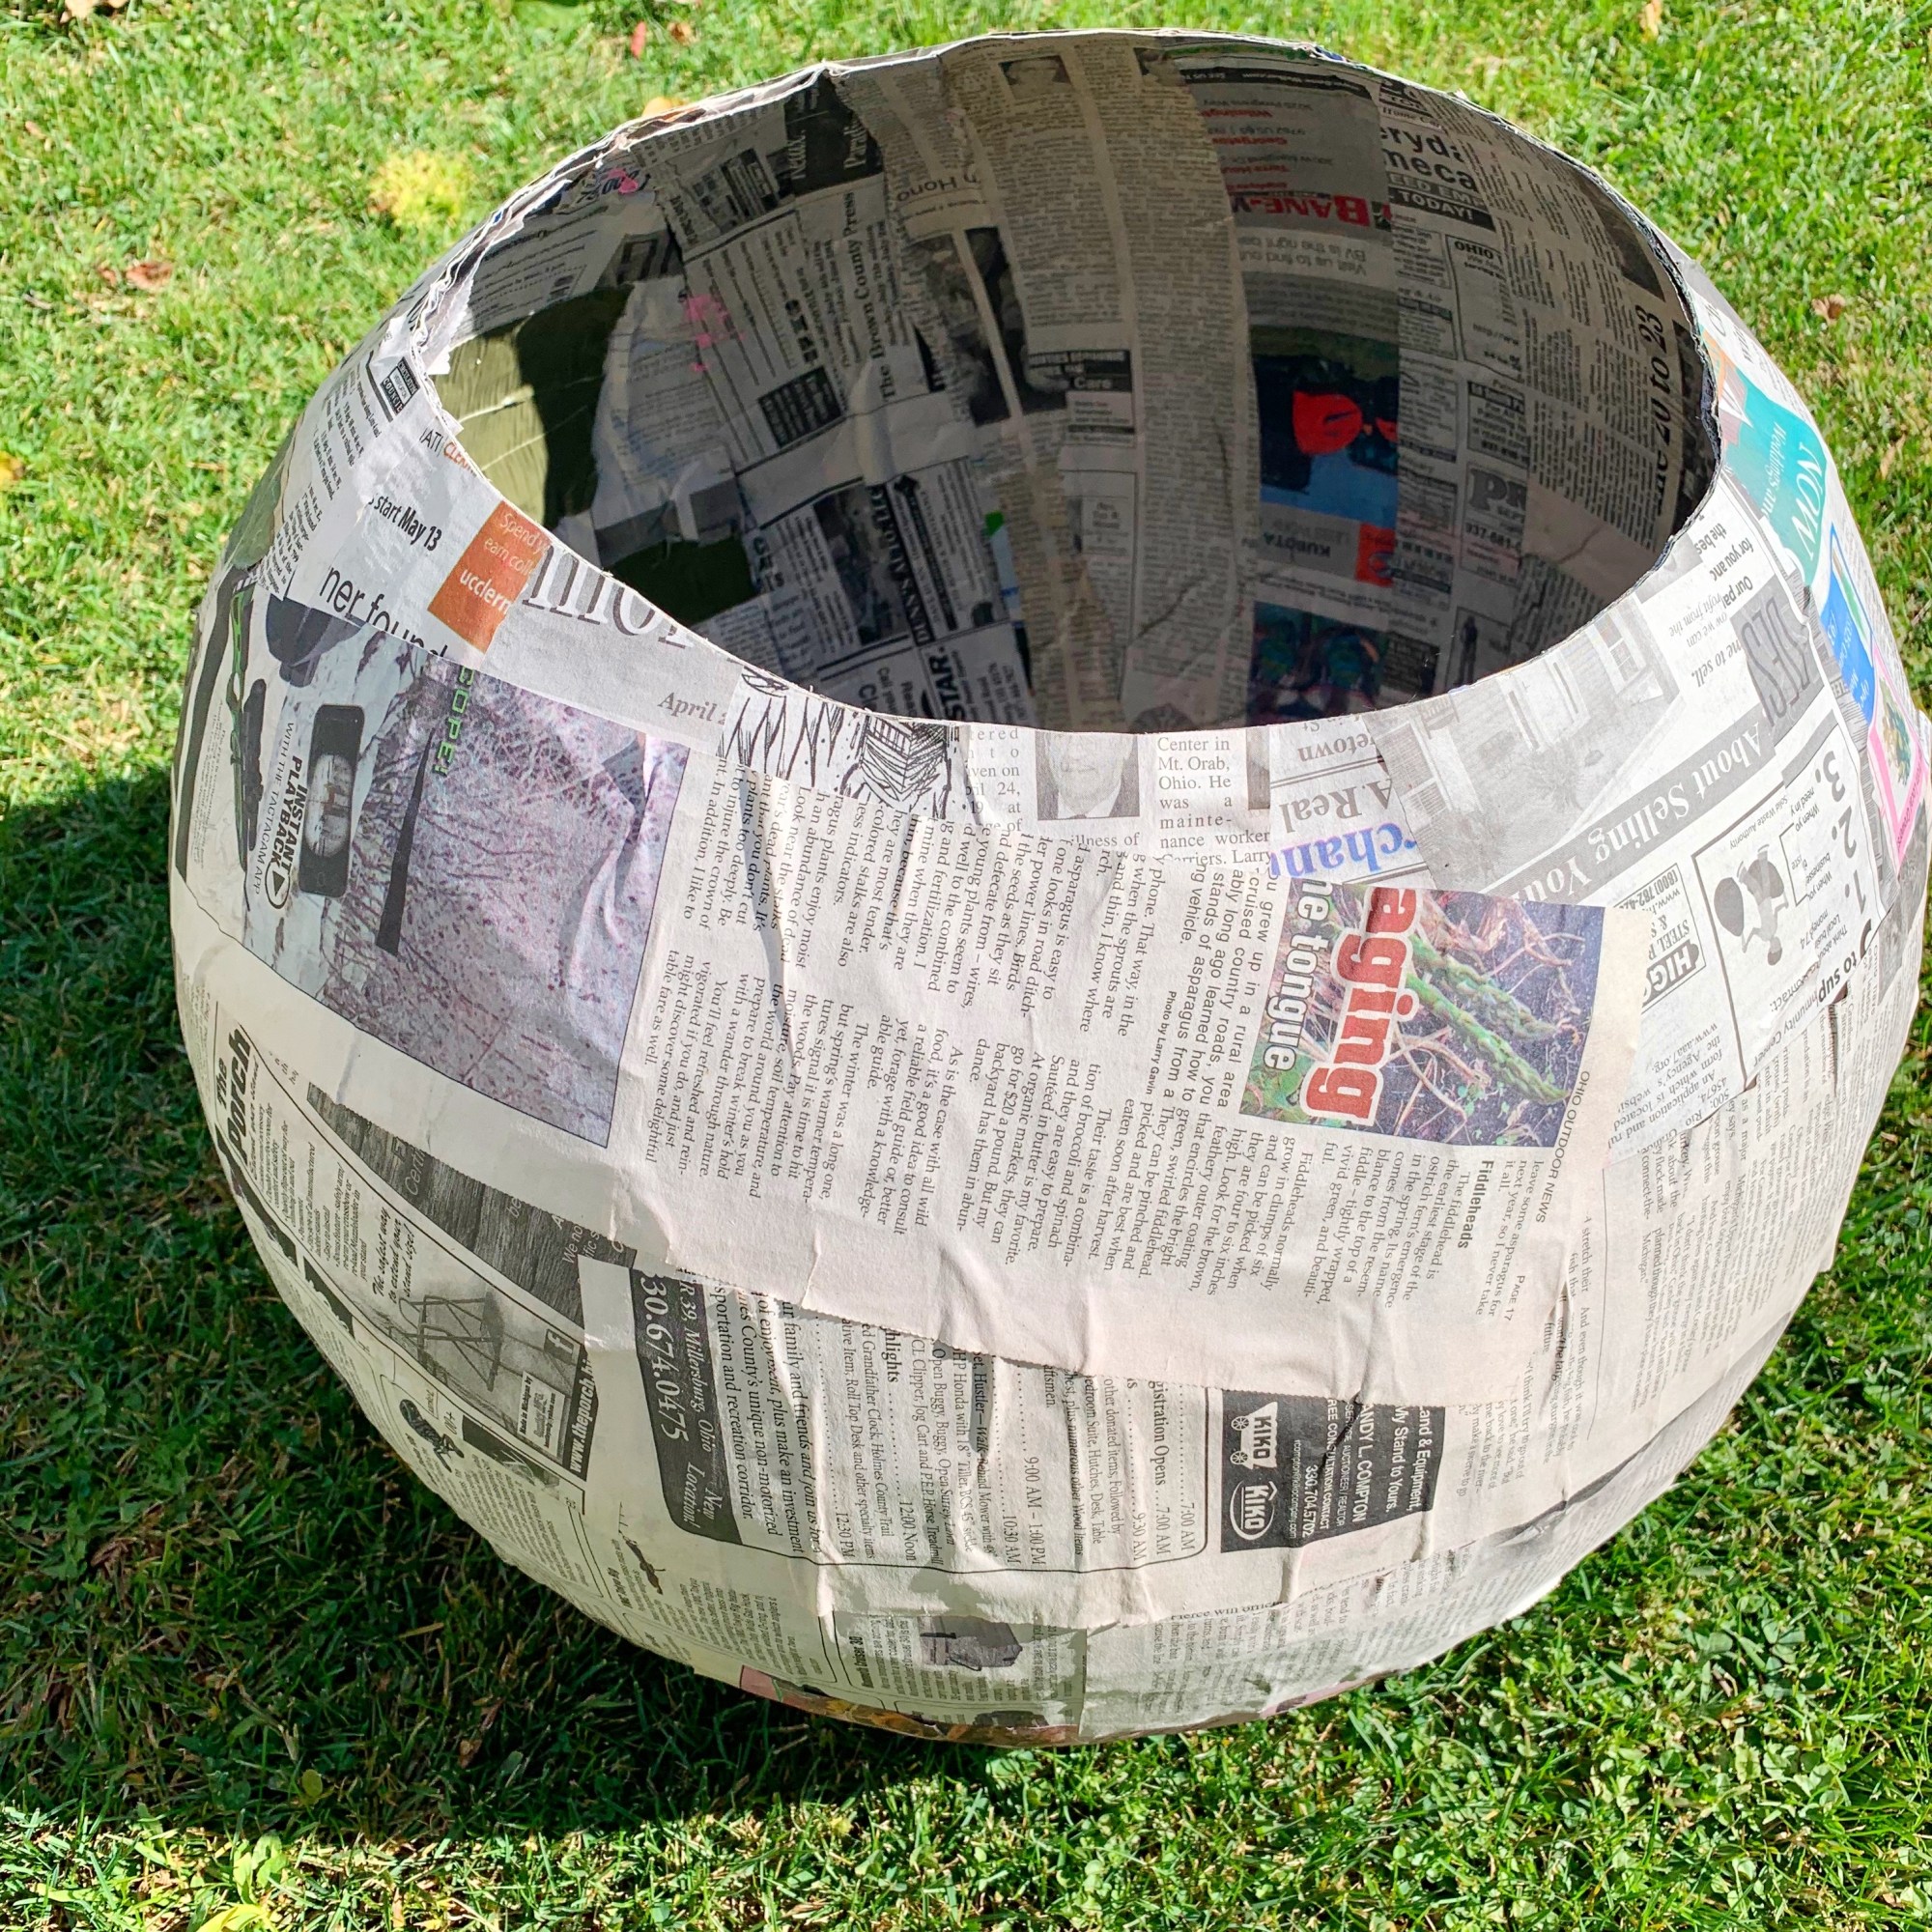
3.) Once all your layers have been completed and the newspaper is completely dry, its time to remove the balloon. Cut a hole in the balloon and deflate slowly. Make sure to remove all access pieces of balloon inside the ball.
4.) Next you will trim the top and bottom holes of the ball. Start by trimming near the existing edge of ball and try to step into it. Keep trimming away until the ball is able to fit over your hits, or at least over your head so you can wear it.
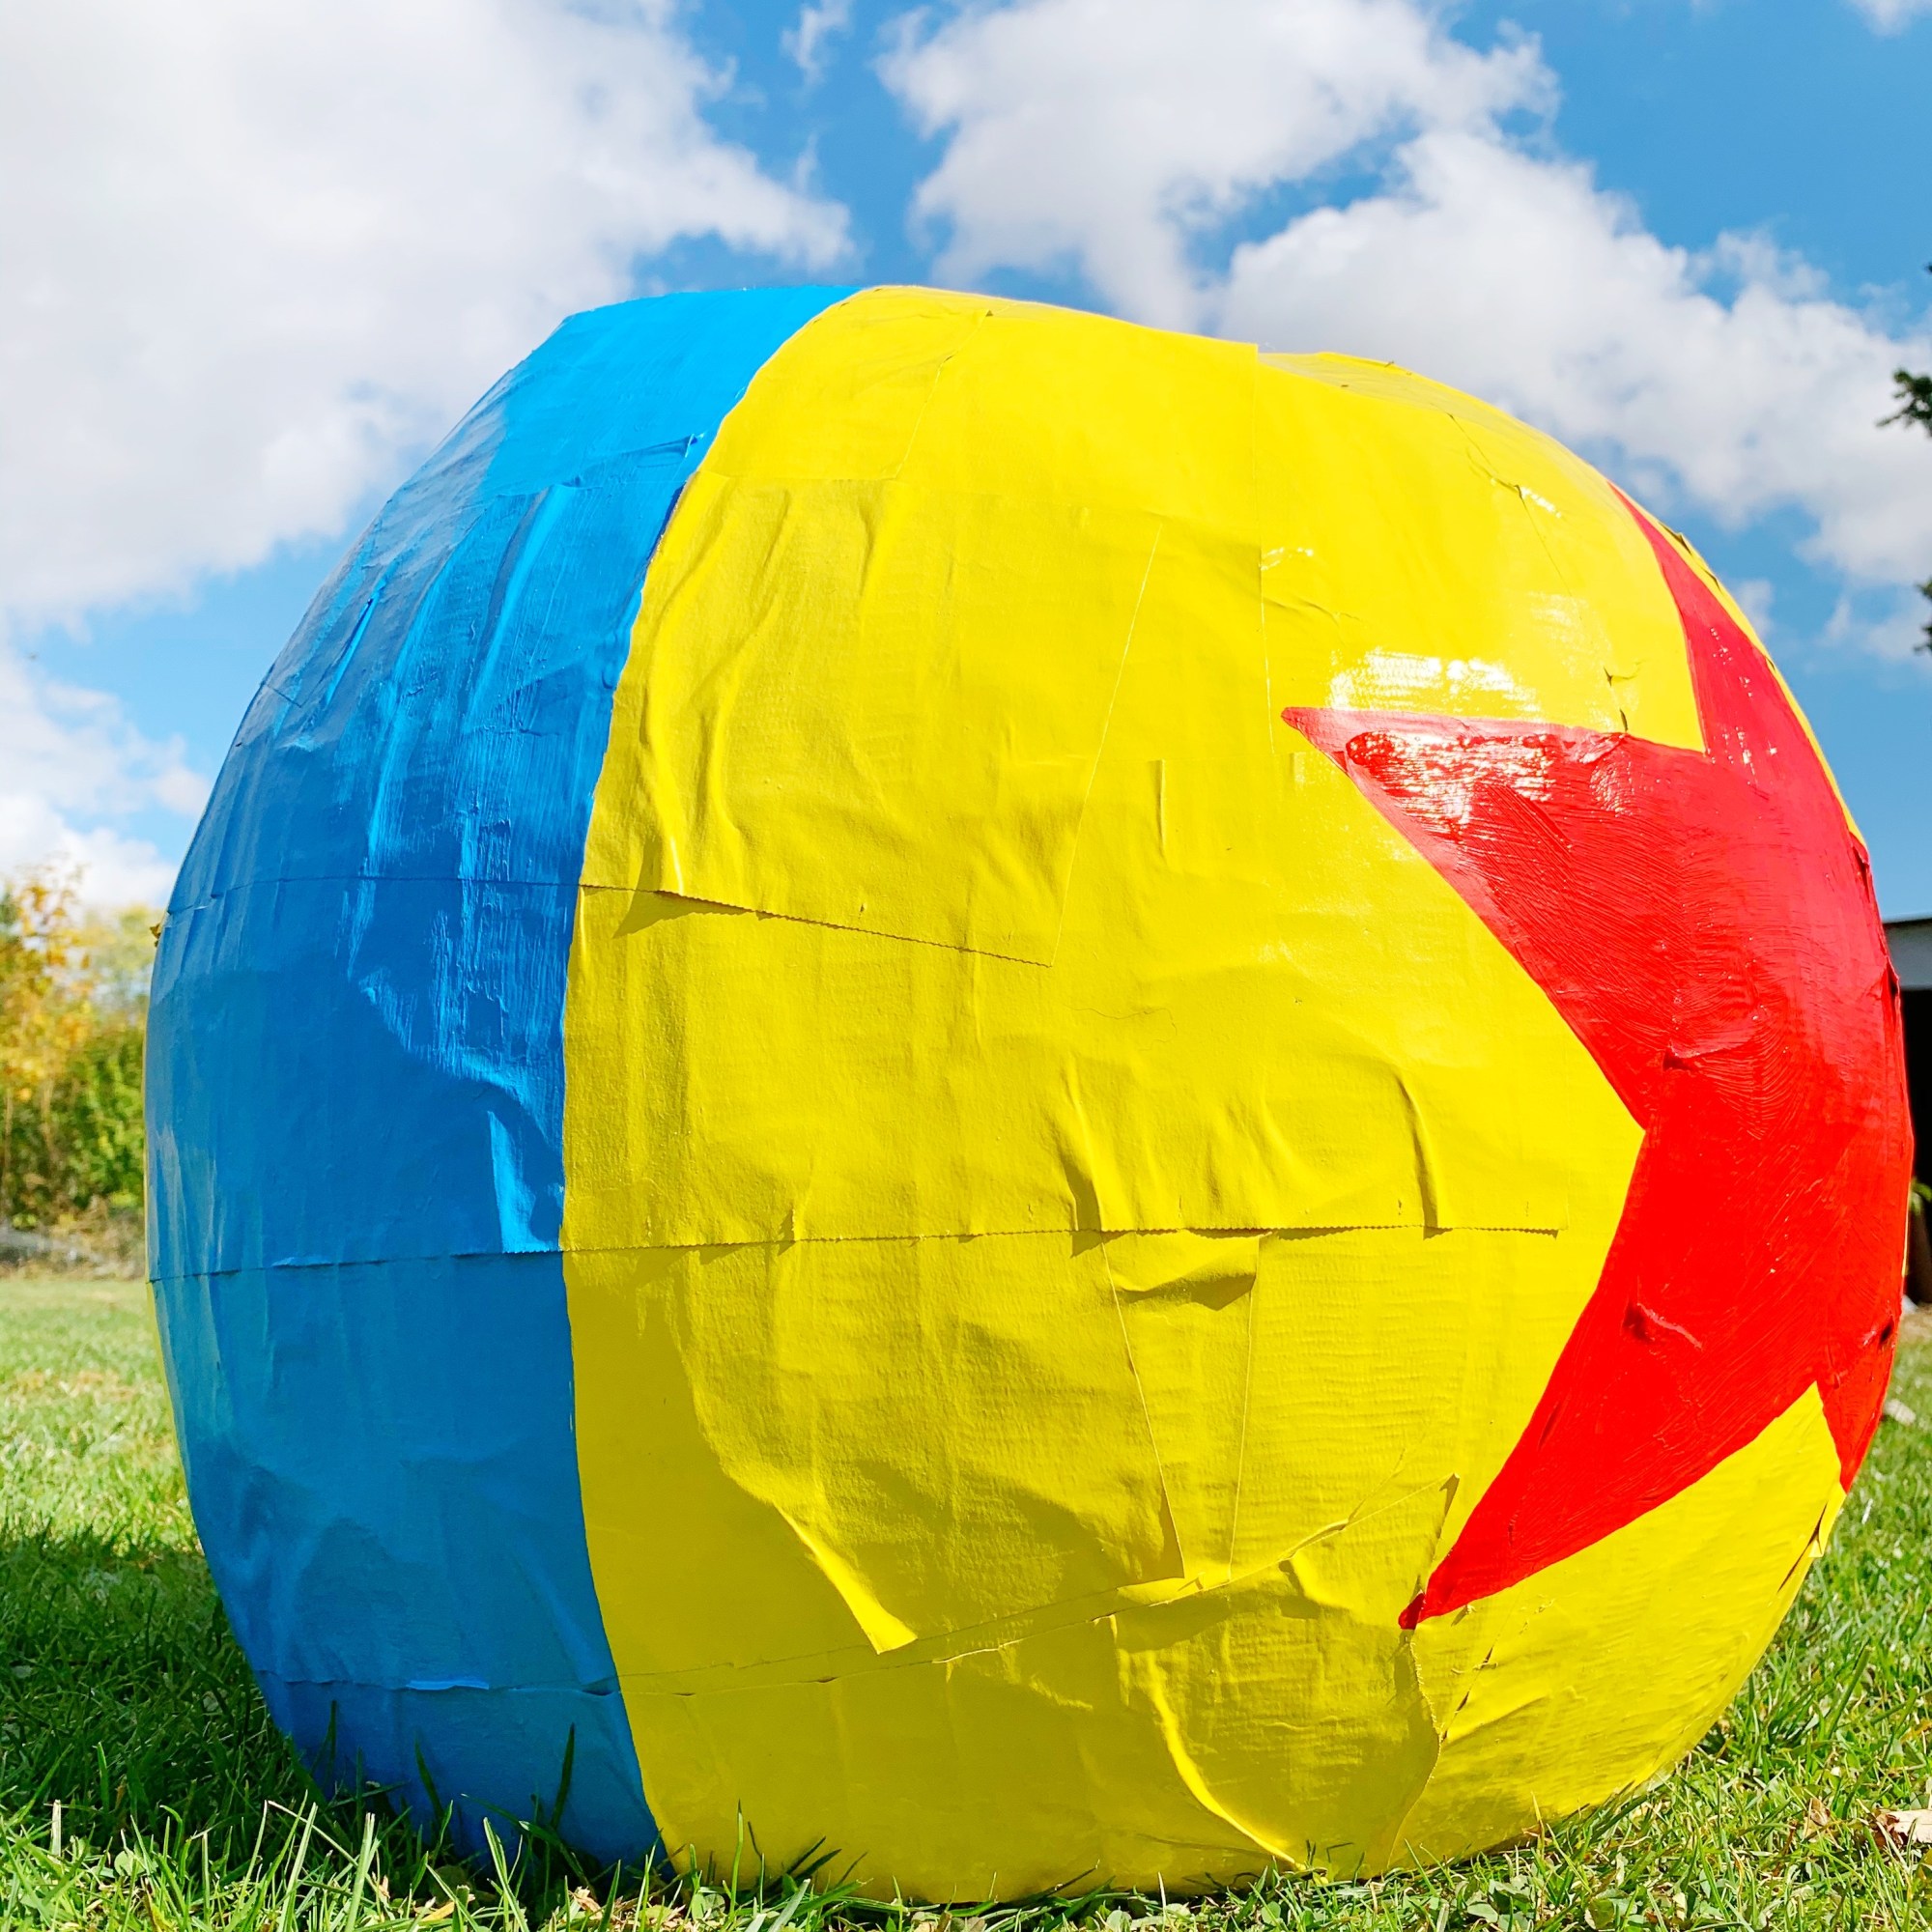
5.) Now that you have your desired circumference of the opening on both ends of the ball, it is time to paint! Take your yellow spray paint and spray the entire ball. Allow each paint layer to dry and then repeat. Make sure ball is completely and evenly painted.
6.) Once the spray paint is completely dry, it’s time to add the details! Take your blue paint and paint a thick blue stripe down both sides of the ball. Repeat once paint is dry if first coverage is not enough. Now you will need to paint a large red star on the front and back of the ball with your red paint. You can either free-hand the star, or make a stencil to insure it is symmetrical. Repeat paint as needed and make sure to allow the paint to completely dry.
7.) Next we need to make this ball wearable. Take your ribbon and cut out 2 straps to go over your shoulders to hold the ball up. I stepped into the ball and held it up exactly where I wanted it to sit on my body, to help me determine strap length. Once you have your desired length, duct tape the ribbon onto the inside of the ball to make sure a long-lasting hold.
8.) Decide on your perfect outfit to accompany your ball and you are good to go!
***BONUS**
To make the PIXAR headband:
1.) Print out the PIXAR logo and glue it to a piece of foam board. Once the glue is dry, cut each letter out individually from the foam board.
2.) Buy a headband (I bought a red one to match) and use your hot glue gun to glue the letters onto the headband. Voila!
AUBURNARTISAN.COM

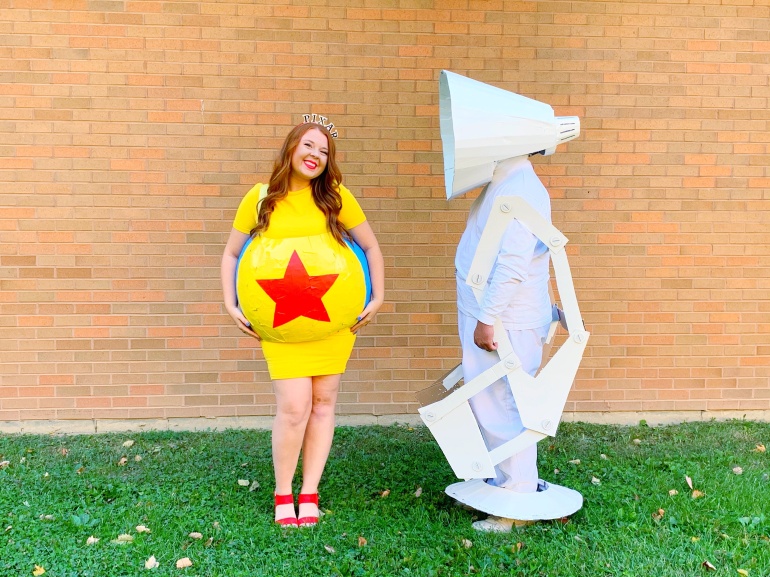
I love this costume so much and I am proud that even though it took me years to finally attempt it, I did! And I *believe* that it looks pretty accurate! But I don’t know, do you agree??


Created and photographed by Auburn Artisan

Hello!
My daughter Valentina has mental disability and special needs and she would love to dress up as a Pixar lamp for this Halloween. She is 10 years old and needs to be on a wheel chair. I know it’s random…. But could you help me find a costume for her?
thanks!
LikeLike
Hello! I am based in Brooklyn NYC and am the mother of a three-legged shih tzu named Dr. Computer Chips. Check her out on instagram: https://www.instagram.com/dr._computer_chips?utm_source=ig_web_button_share_sheet&igsh=ZDNlZDc0MzIxNw==
Every year we enter into a dog costume contest and this year she wants to be Pixar’s Luxo Lamp Jr. and wants me to dress up as Luxo Lamp Sr. While researching how to make the costume I came accross your website.
Do you have any advice on making the costume for me and chips with limited time and not great fabrication skills. I would also be willing to pay for a costume if you’re up for the challenge.
LikeLike