

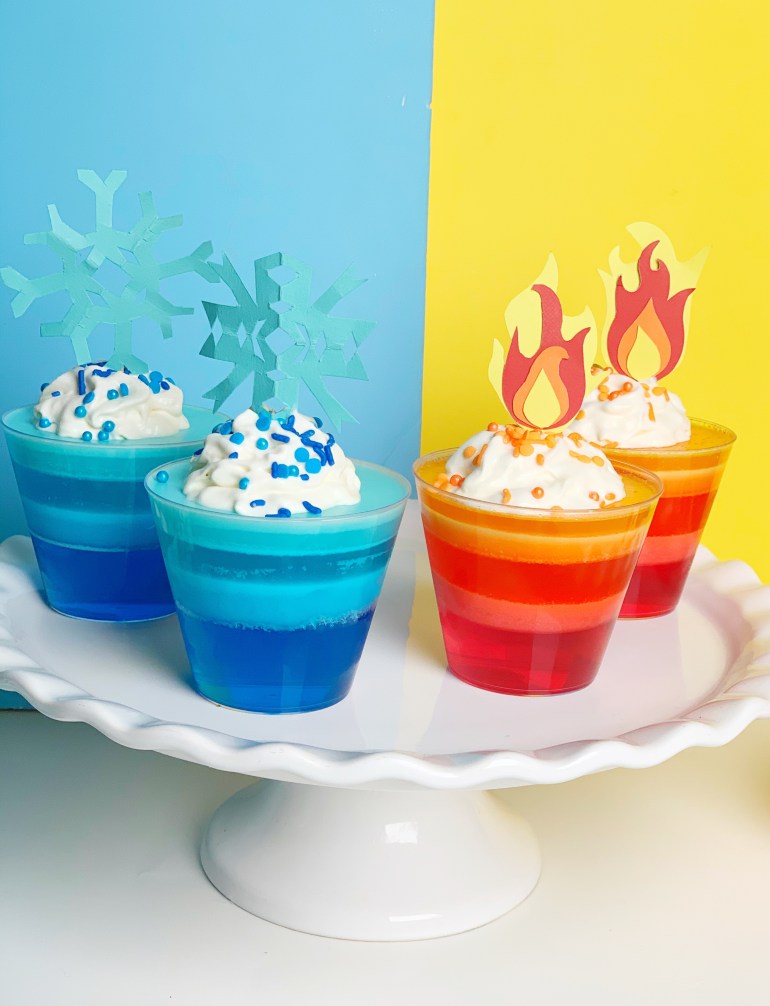
I don’t know about you, but my absolute favorite Christmas movie of all time has to be The Year Without Santa Claus! And what is that movie without Heat Miser and Snow Miser?! Those colorful characters inspired these colorful jell-o cups!
I was trying to brainstorm ideas for some DIY’s this Christmas and I was reminiscing on all my favorite Christmas things to do, things to eat and movies to watch, and that’s when I came up with this idea! I am a sucker for those nostalgic old claymation holiday films, and The Year Without Santa Claus is no exception!
If you have never seen it, or just need a re-cap: The Year Without Santa Claus is about a Christmas where Santa has fallen ill and decides to take some time off rather than participate in Christmas activities because he is in disbelief that there is any Christmas spirit left in the world. In an eager attempt to prove Santa wrong, two elves, Jingle and Jangle, take one of Santa’s reindeer, Vixen and head to Southtown, USA to find some Christmas believers. Vixen ends up getting trapped by an animal catcher who refuses to let her go to the elves. The elves try to convince the mayor of Southtown that they are Santa’s helpers and that Vixen is one of Santa’s reindeer. The mayor states that if they can get it to snow on Christmas in Southtown (where it never does) then he will believe them and set Vixen free. This means that Jingle and Jangle (with the help of Mrs. Claus) have to convince the Heat Miser to give up his territory of Southtown so that Snow Miser can make it snow on Christmas. The Miser brothers fight over who gets control of the weather for Southtown and they all end up needing to consult with their mother (Mother Nature) to make the brothers comply and work together and save the spirit of Christmas.
That movie brings back so many warm childhood memories to me, and that’s why I decided to make these cute little jell-o cup desserts to help celebrate Christmas this year! Plus, Heat Miser and Snow Miser’s legendary song may be the most iconic song ever written! haha Just kidding! But how catchy is that thing?! (video below)
Heat Miser + Snow Miser Jell-O Cups
Supplies:
– Jell-O Mix (red, orange, yellow, light blue and dark blue)
– Whipped Topping
– Clear Dessert Cups
– Sprinkles
– Tooth Picks
– Construction Paper (red, orange, yellow and light blue)
– Scissors
– Glue Gun
How To:
HEAT MISER JELL-O CUP
STEP A:
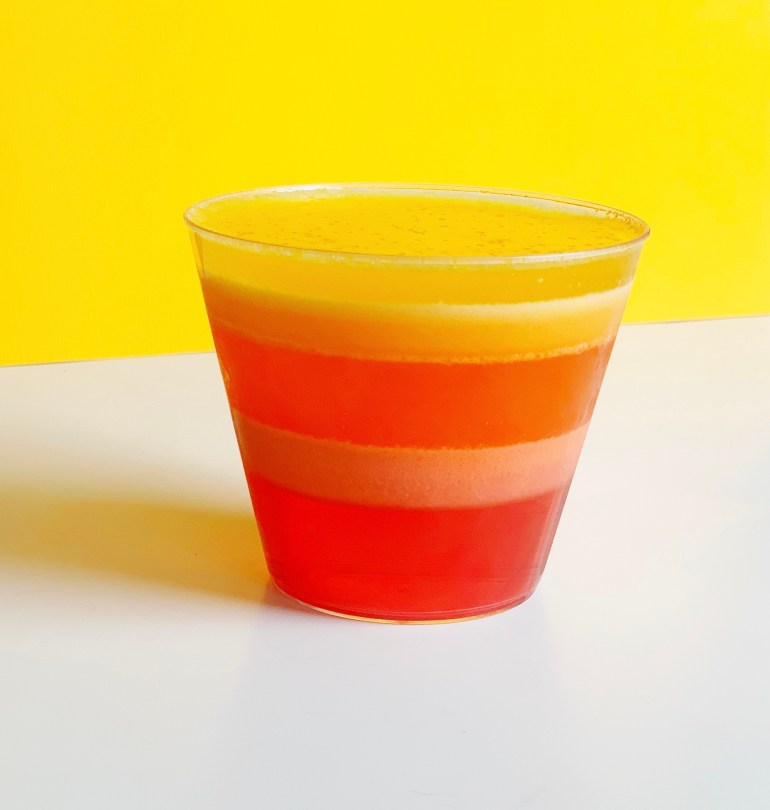
1.) Prep red jell-o mix following directions on the box. Once mixture has been made, divide into two equal parts and set half of the mixture aside. Take one half of your red jell-o mixture and pour an even amount in each dessert cup. You should only fill the cup about 1/4 – 1/3 full with the jell-o mixture. Set cups in your refrigerator to cool and solidify jell-o.
2.)Take your other half of the red jell-o mixture and add a dollop of whipped topping into the mix. Stir together the red jell-o mixture and whipped topping until fully incorporated. This will give the red a more opaque, redish-pink color. Once your initial red jell-o is nice and solid in the cup, pour a thin layer of this remaining redish-pink mixture on top of it. Once again, set cups in your refrigerator to cool and solidify.
3.) Repeat steps 1 and 2 for your orange jell-o. Always allow time in between layers for jell-o to fully solidify or the mixture will combine with the previous layer.
4.) Repeat steps 1 and 2 for your yellow jell-o. Always allow time in between layers for jell-o to fully solidify or the mixture will combine with the previous layer.
STEP B:
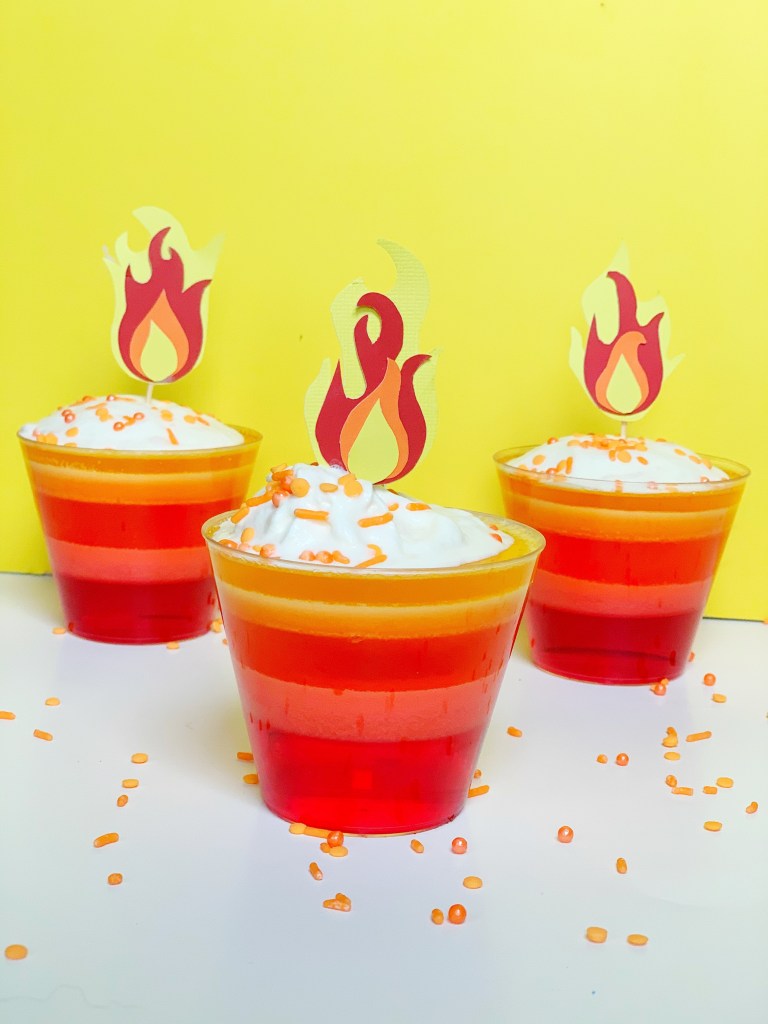
1.) Now that your jell-o mixture is fully solidified in your cup, it’s time to make the decorations! You can either print out a picture of flames onto a piece of card-stock paper or you can cut your own out of colored construction paper.
2.) Once you have cut out your flames, glue each onto the end of a tooth pick.
3.) Put some whipped topping on top of the jell-o, sprinkle on a bit of sprinkles and stick the tooth pick through- and enjoy!
SNOW MISER JELL-O CUP
STEP A:
1.) Prep dark blue jell-o mix following directions on the box. Once mixture has been made, divide into two equal parts and set half of the mixture aside. Take one half of your dark blue jell-o mixture and pour an even amount in each dessert cup. You should only fill the cup about 1/4 – 1/3 full with the jell-o mixture. Set cups in your refrigerator to cool and solidify jell-o.
2.) Take your other half of the dark blue jell-o mixture and add a dollop of whipped topping into the mix. Stir together the dark blue jell-o mixture and whipped topping until fully incorporated. This will give the dark blue a more opaque, medium blue color. Once your initial dark blue jell-o is nice and solid in the cup, pour a thin layer of this remaining medium blue mixture on top of it. Once again, set cups in your refrigerator to cool and solidify.
3.) Repeat steps 1 and 2 for your light blue jell-o. Always allow time in between layers for jell-o to fully solidify or the mixture will combine with the previous layer.
STEP B:
1.) Now that your jell-o mixture is fully solidified in your cup, it’s time to make the decorations! You can either print out a picture of a snowflake onto a piece of card-stock paper or you can cut your own out of light blue colored construction paper.
2.) Once you have cut out your snowflakes, glue each onto the end of a tooth pick.
3.) Put some whipped topping on top of the jell-o, sprinkle on a bit of sprinkles and stick the tooth pick through- and enjoy!
UBURNARTISAN.COM
Step A

Step B

I am so happy with how these jell-o cups turned out, and now all I want to do is watch The Year Without Santa Claus on repeat until Christmas! Merry Christmas everyone!


And don’t you ever for a second think that I wasn’t singing that song the entire time I was making these!
“I’M TOO MUCH!”

