

It is officially vacation season!!! And one of my favorite (and maybe yours too) vacation destinations of all time is Disney World/Disneyland! I mean they don’t call it “the most magical place on Earth” for nothing! But you simply cannot go to Disney without wearing your Mickey ears!!! So, I thought I would show you how to make your own!
Disney has basically anything you could ever dream! But sometimes that means it comes with a hefty price tag… DIYing your very own ears is not only more affordable than the parks, they are also more customizable! You can make them look exactly as you’d like them to! Want to match your seriously cute top you just bought?? Want to make them character themed? If you can find the fabric, you can make the ears!

Mickey Ears
Supplies:
– ¼ yard of fabric of your choice (for ears)
– ¼ yard of fabric of your choice (for bow)
– 1 inch satin headband
– Hot glue gun and glue sticks
– Scissors
– Thread and needle
– X-Acto Knife
– Ribbon
– 3/16 inch foam board
Instructions:
Step 1.) Cut out four identical 4“ circles from the foam board. You can do this using scissors if you like, but it may be easiest to use an x-acto knife.
Now that you have cut out your circles, we will need to slice a little section from the bottom so that the circles have a little edge to set flush to the head band. The best way to do this is to set two of your circles down on a flat surface and then lay the headband on top of them in the position you would like the ears to be placed. There should be about a 2″ gap between the ears. Once you have decided on the ear positioning, take a pencil and trace around the top side of the headband onto the circle foam board. Repeat this for the other circle. Once lines are drawn on each circle, cut along the line with your x-acto knife.
Use your newly cut circles as a stencil and mark the remaining two circles with identical lines to cut. Cut them out as well. Now you should have four identical circles with identical arched cuts out of the bottom.
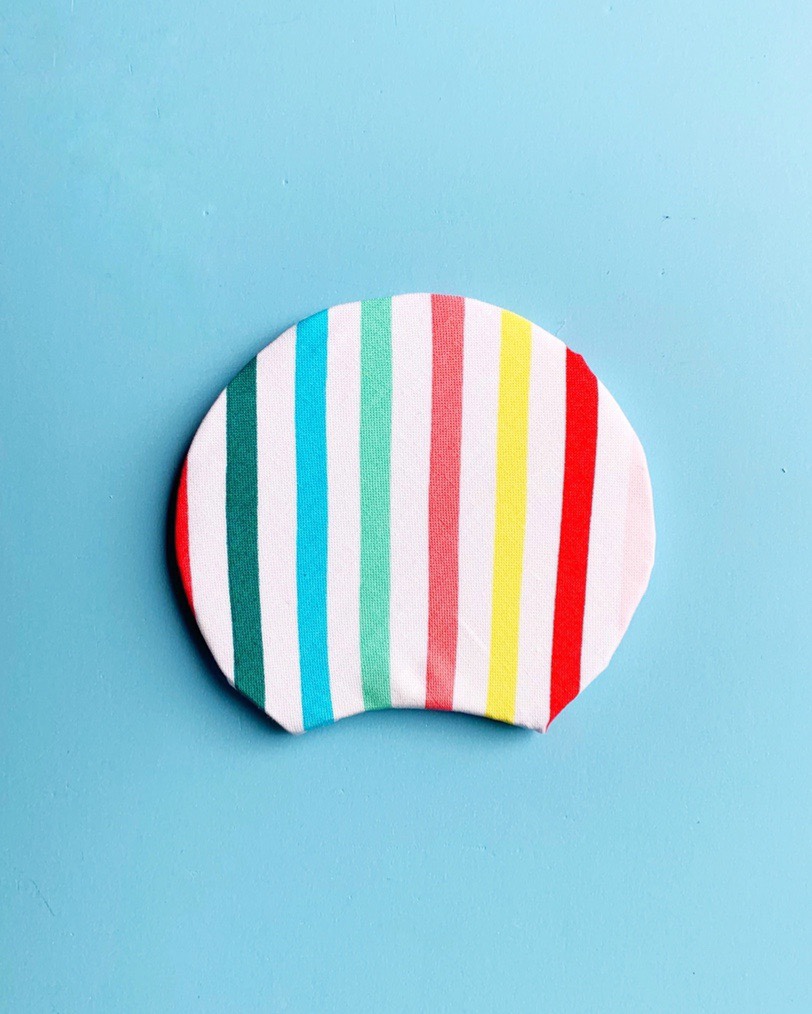
Step 2.) Cut a 6″ circle out of the (ear) fabric.
Place your foam board cut circles on top of your fabric. Since the foam circle is 4″ and the fabric is 6″ there should be a 1″ overlay of fabric along the entire circumference of the foam circle.
Stretch this access fabric across the back side of the foam circle and glue it into place with your hot glue gun. Be sure to pull the fabric taut.
Repeat three times for each remaining foam circle.
Now that all four of your foam circles are covered with the fabric, you will bonding them together. Take two of your circles and glue them together with your hot glue gun. Make sure you are gluing together the unfinished sides.
Repeat for the remaining two ears.
Now that your pieces are glued together, we will cover up the seam in the middle of the the circles with the ribbon. Glue the ribbon on with the hot glue gun.
Step 3.) Cut out an 8″ x 10″ section from your (bow) fabric.
First fold in your fabric hotdog style, bringing the edges together in the center.
With the hotdog folded fabric, fold it one more time hamburger style. Bringing the edges together in the center.
Now that you have a folded rectangle of fabric, pinch the center together. This will give the bow folds. Fold the fabric back and forth accordion style and once you have reached your desired folded look sew the folds together using the thread and needle.
Make sure the to sew the middle of the bow taut.
With a small piece of remaining (bow) fabric, wrap it around the middle of the bow to hide the thread.
Glue the small piece of fabric to the middle of the bow so it does not move out of place.
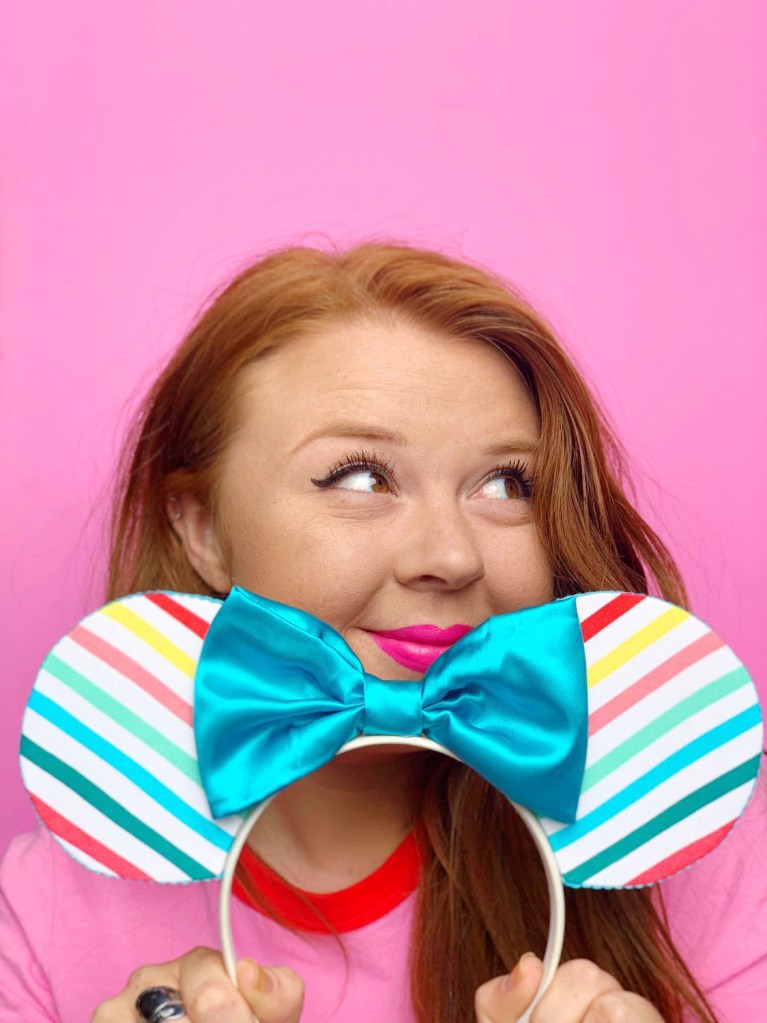
Step 4.) Glue the finished ears to your headband 2″ apart from one another with your hot glue gun.
Glue your bow in between your ears.
AUBURNARTISAN.COM
Step 1


Step 2


Step 3


Step 4


You see? So simple! Now you can make yourself a new pair of ears each time you visit Disney! And hey, maybe make some for your friends too!


This project is just as cute as you! ☺️ I am LOVING that lipstick, by the way 🙌
LikeLike
This is such a great idea!! Especially because those Disney ears are so expensive and I only end up using them while I am in Disneyland.
LikeLike
Were did you get your headband? Or did you place the fabric on it yourself?
LikeLike
I just got the headband from my local dollar store actually! I just made sure to get one that was fabric, rather than plastic so that the glue would have something to stick to! 🙂
LikeLike