

One of the best parts of Valentine’s Day when I was younger was making some of my own Valentines to give to my friends and maybe even someone special. 😉 So I thought it would be fun to make Valentines for my second Kiddo Craft! And why make a regular old Valentine when you can make a pop-up one?!

SUPPLIES
- Rubber Cement or Glue Stick
- Scissors
- Rainbow Construction Paper (I just used this sticky note set!)
- 2 Large Sheets of Paper for the Backdrop (approx. 12″x12″ if you want your card as large as mine)
- White Cardstock
- More Rainbow Construction Paper for Lettering
- Letter Stickers*
- Pen/Pencil*
*Extra/Optional Supplies
HOW TO:

Step 1: Fold your large sheets of paper (hotdog style). I opted for one blue sheet and one white sheet.


Step 2: Once both sheets are folded, take one of your sheets (I did the blue one) and make a mark 2 inches from the end of the paper (on the folded side). From that mark, measure 2 1/2 inches up and draw a line. Repeat this step on both sides of folded paper so that you have symmetric lines.
Step 3: Cut each of the lines you just marked.
Step 4: Fold up the middle section of the paper you just cut. Once you have created a clear crease, push the middle fold inside the paper the opposite way it was originally folded. This will create a 3D fold, and will be the middle tier of your card.

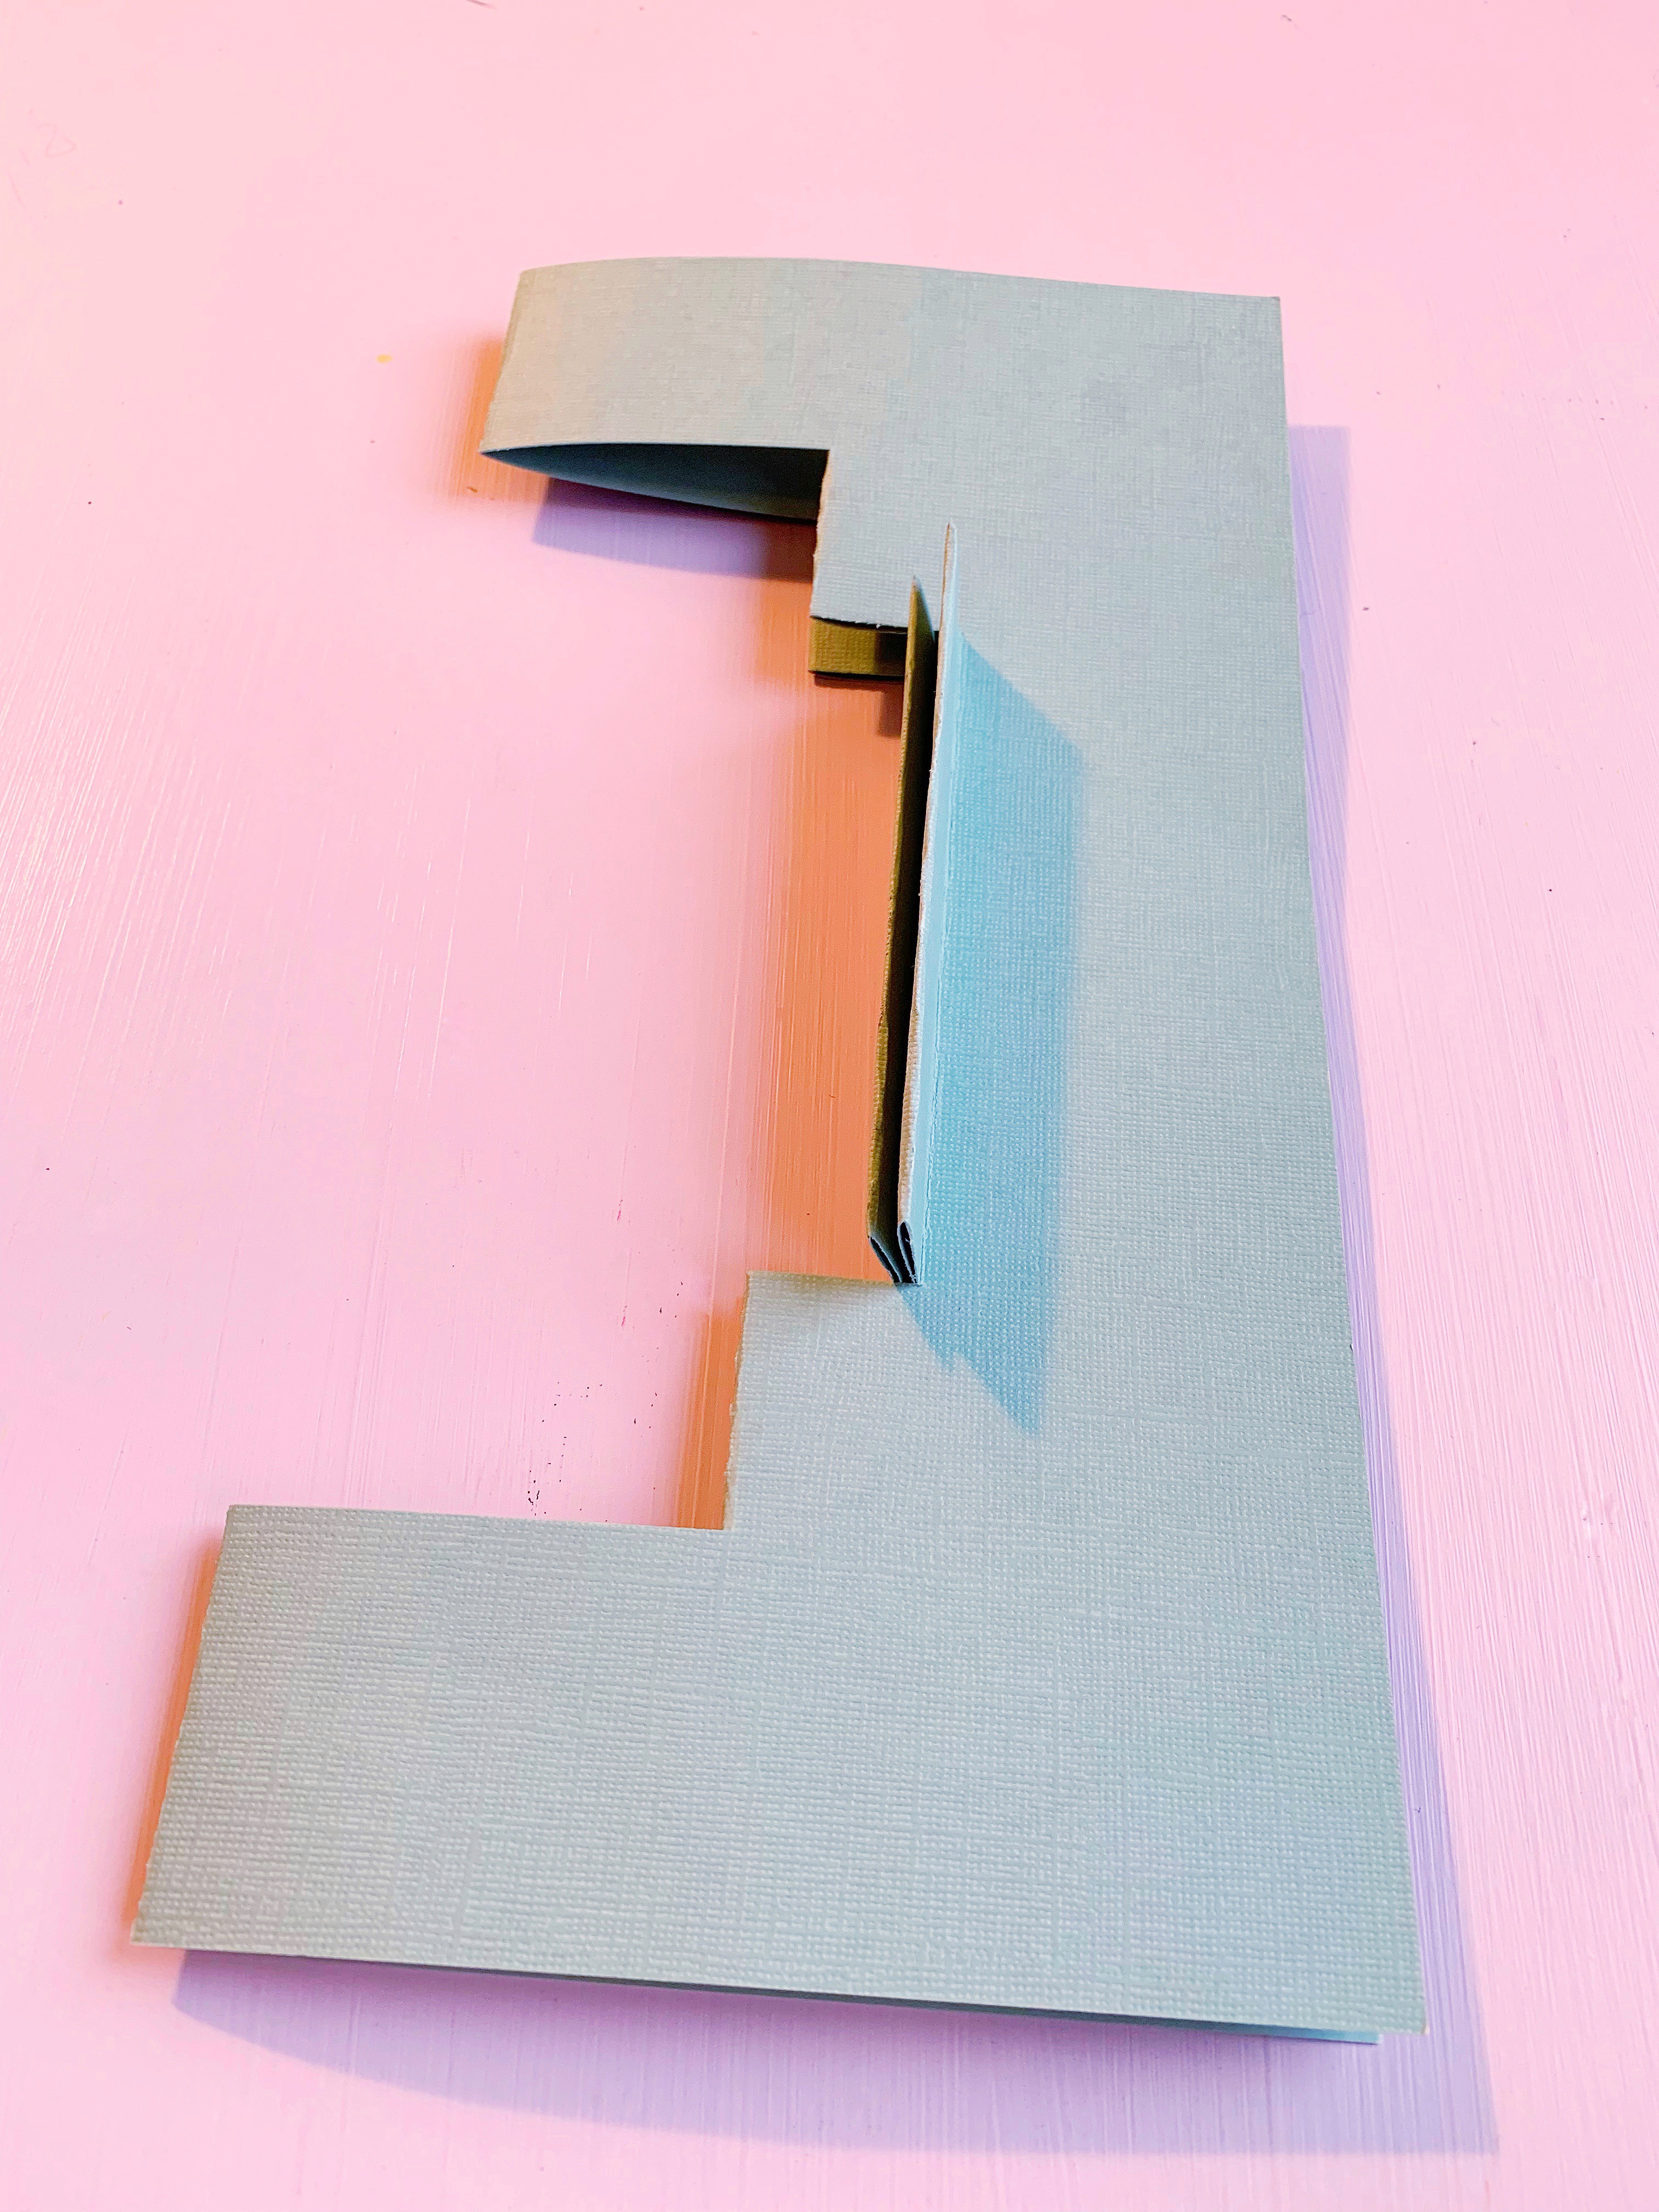

Step 5: Now that the middle is folded inward, make another mark 1 inch in from the first cut, on both sides. Measure a 1 inch line up from that mark and draw a line. (Just like in step 2)
Step 6: Cut the new lines you just drew.
Step 7: Fold the new cuts to make a crease and then push the folds inward just like you did in step 4. This will create the bottom and top tier for your pop-up card.
Step 8: Once all cuts have been made and have been folded into place, glue your other 12″x12″ sheet to the back of this sheet.

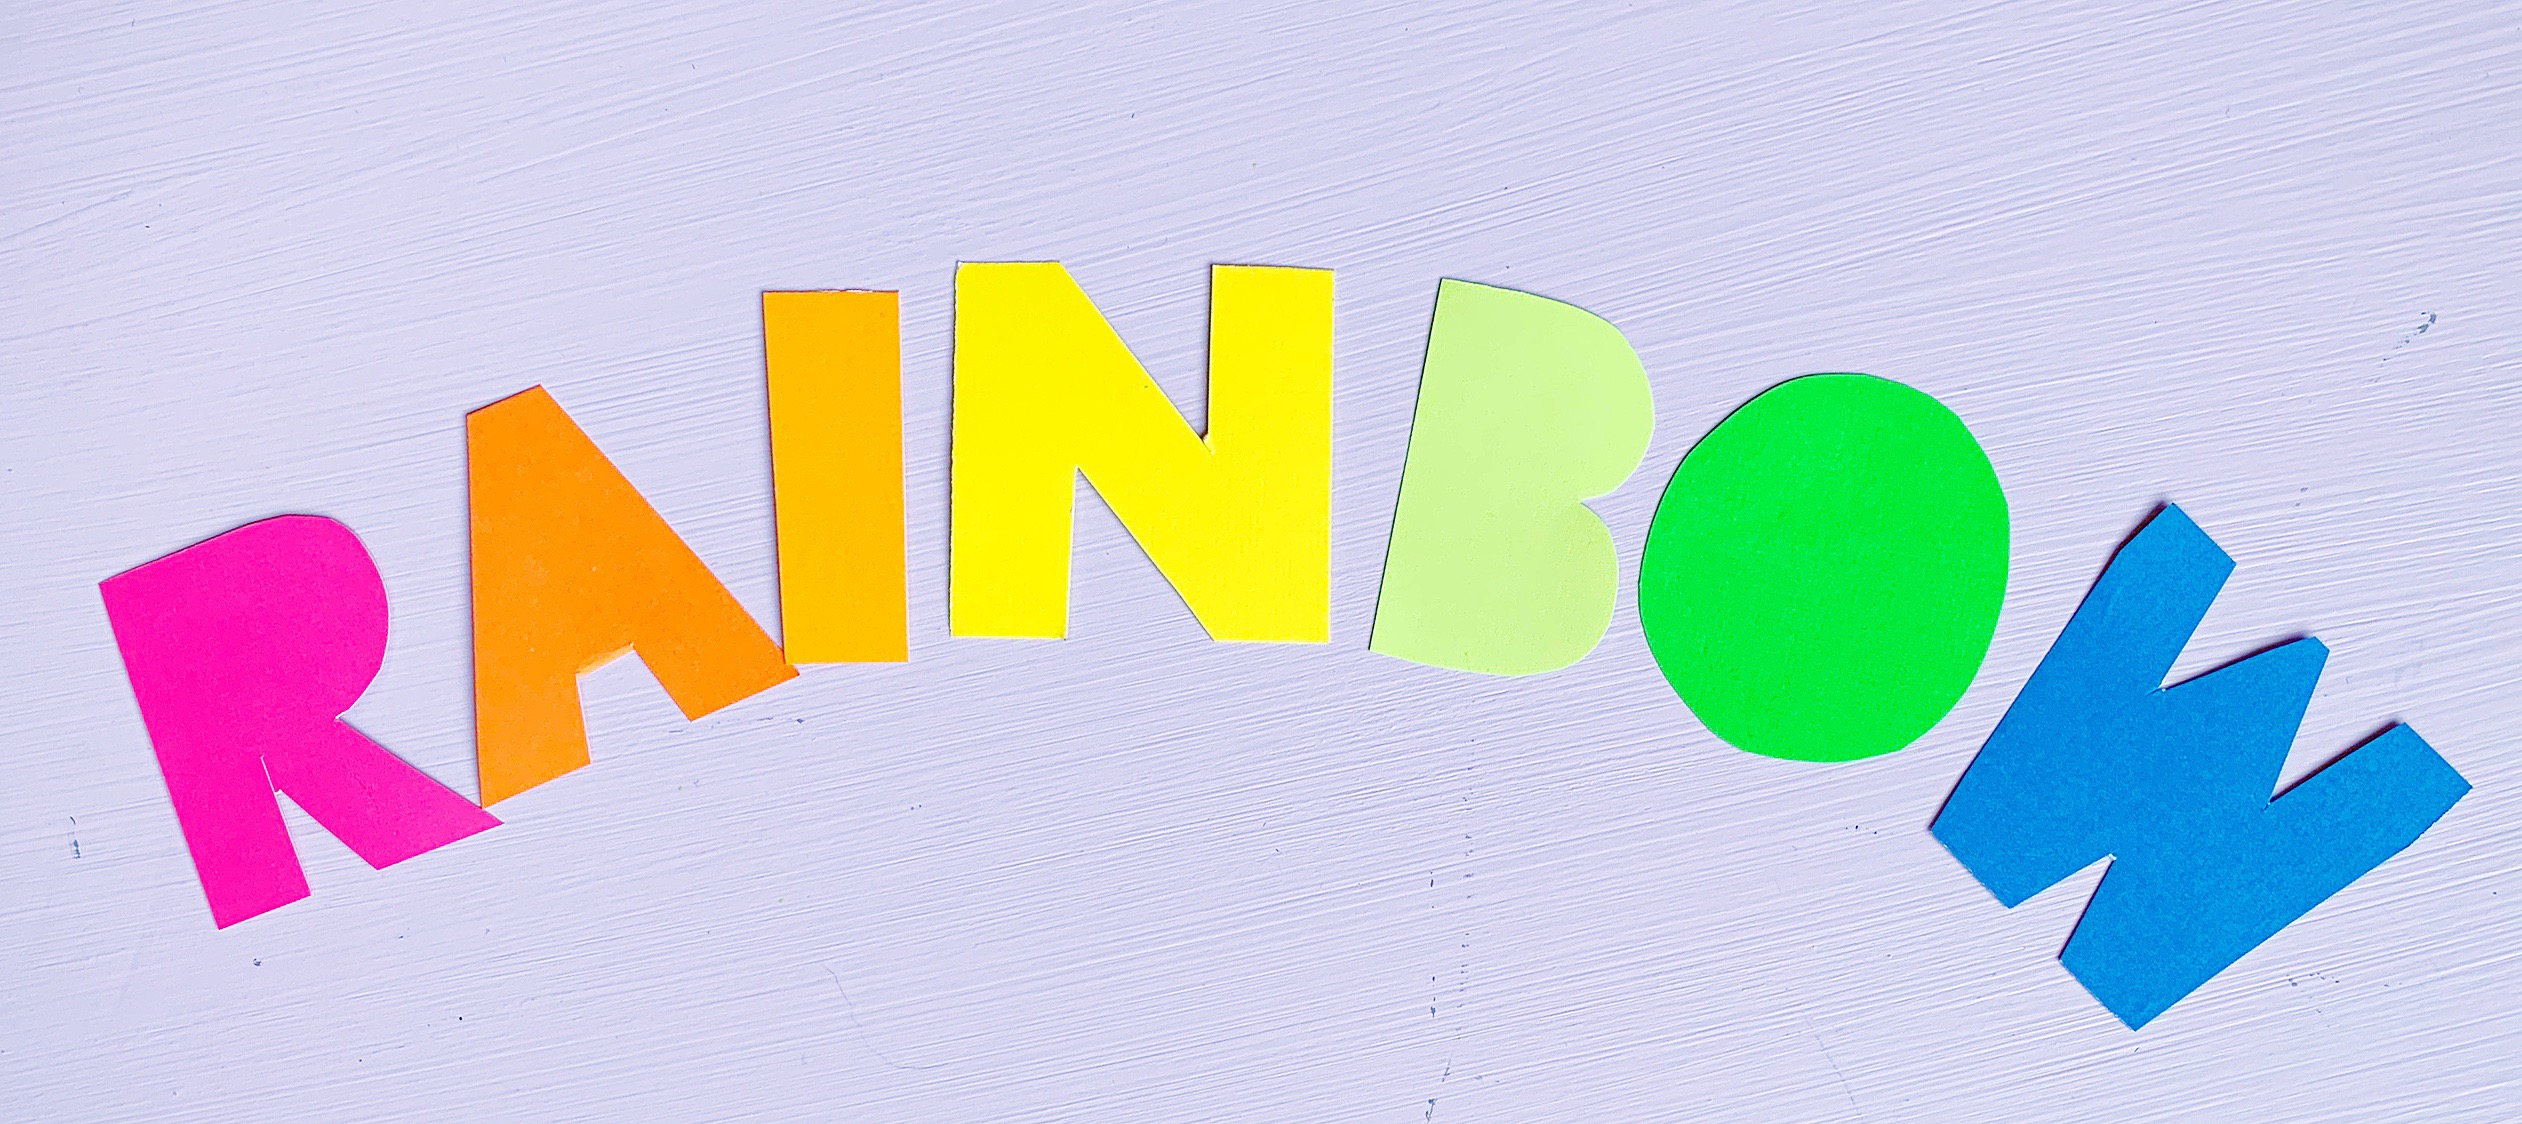

Step 9: Time to cut out the decor for the card! Cut out clouds (as many as you like) from the white cardstock paper. From the colored construction paper I cut out letters for my Valentine. You could also cut out your rainbow from the colored construction paper, but I decided to just glue together the sticky-notes I already had on hand to create the rainbow.
OUTSIDE THE CARD
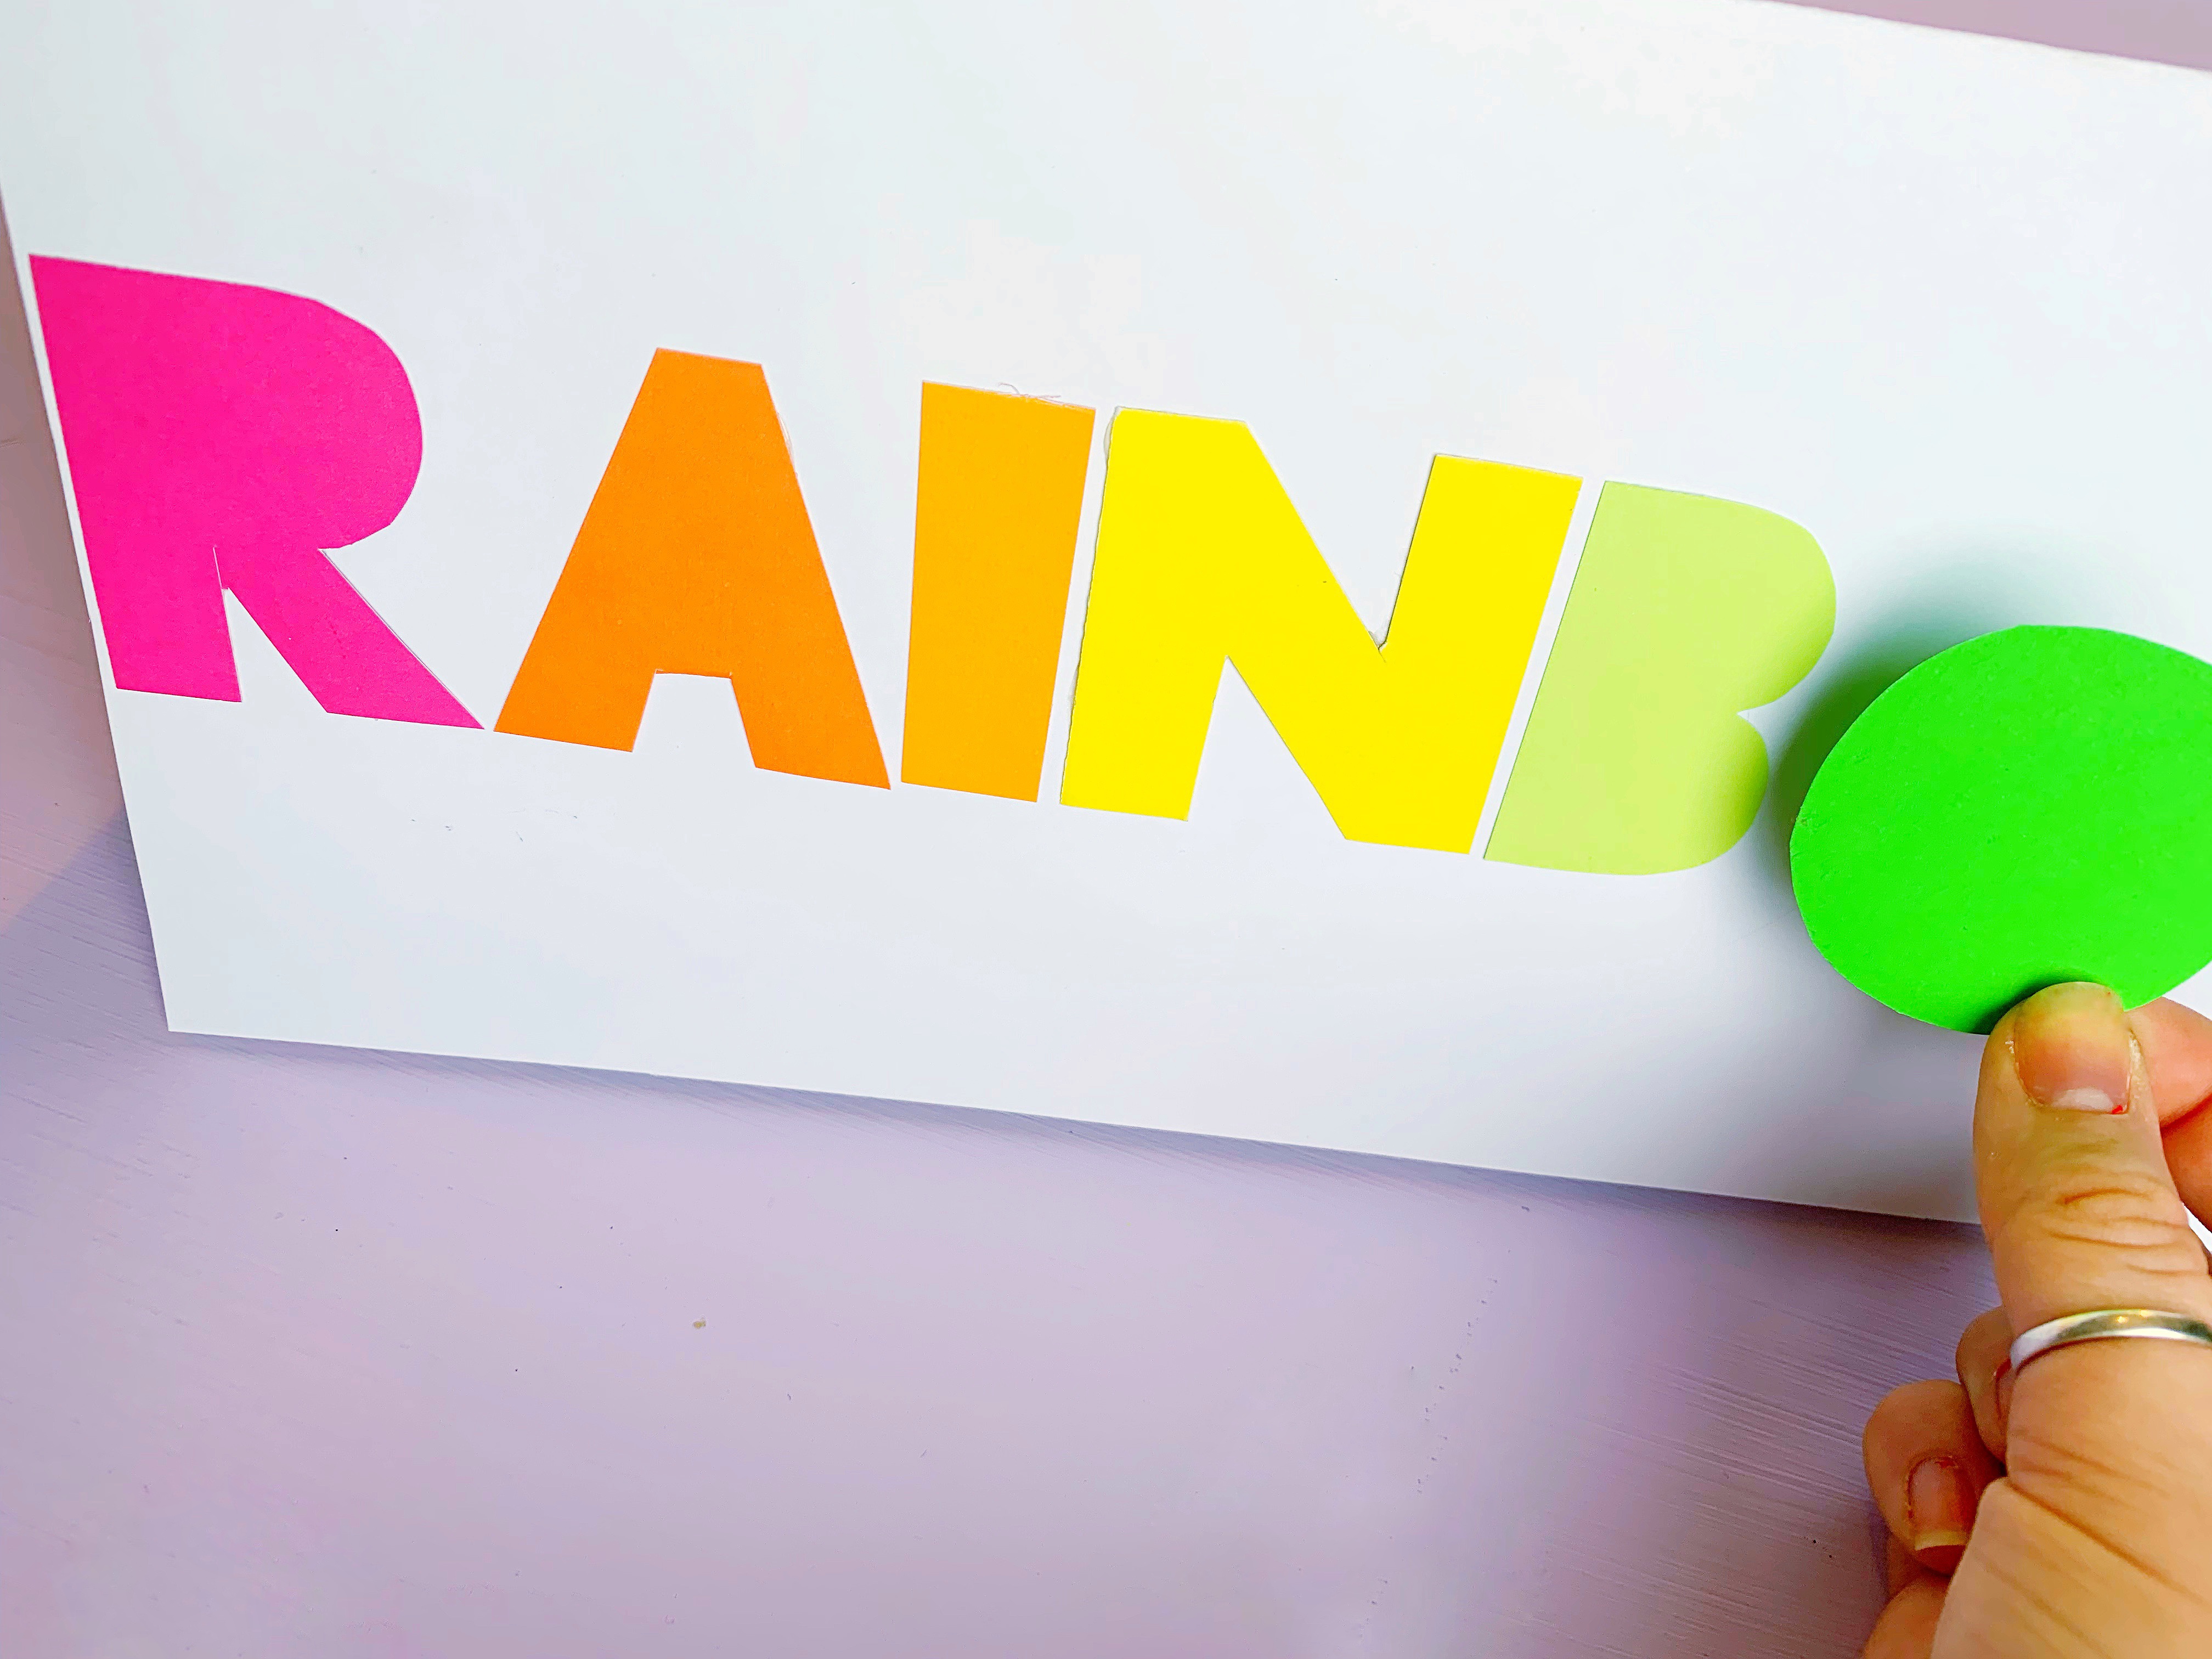
Step 10: Glue the letters to the outside of the card. You can make your card say whatever your heart desires! I decided to go with, “I’m over the rainbow for you” since I wanted to make this card rainbow themed.

Step 11: I decided to use sticker letters to finish my quote, but you could totally free-hand it if you like!
INSIDE THE CARD

Step 12: Glue the rainbow on the top tier fold.

Step 13: Glue all of your clouds onto the other two tier folds. Fill these tiers up with as many or as little clouds as you like. I layered my clouds a bit to make it look like the clouds were stacked and full.

Step 14: I added extra clouds to the the paper behind the rainbow as well as beneath the cloud tiers to give it a little more interest. If you like the rainbow and clouds on the folded tiers alone, that is completely your choice to leave as is!
Step 15: You can add any message you like to the inside of this Valentine, whether it be a sweet little note of adoration or a maybe some words of encouragement for a friend! I am selfish and wanted to keep my Valentine for myself, so I didn’t want to add anything into the inside! haha


Created by Auburn Artisan

One thought on “KIDDO CRAFT – DIY Pop-up Valentine”